The Flexi Mapper Overview
- 01 Aug 2022
- 4 Minutes to read
- Print
- DarkLight
The Flexi Mapper Overview
- Updated on 01 Aug 2022
- 4 Minutes to read
- Print
- DarkLight
Article summary
Did you find this summary helpful?
Thank you for your feedback!
The Flexi Mapper is one of the primary places where projects are designed, configured and visualised. For all proposal work it will be your starting place. From the Flexi Mapper project images can be imported, layouts created and configured and programming created. It's also the place to apply media, which can be applied to one of numerous maps.
Although it is possible to have a LED CTRL project without a Flexi Mapper, it is by far the most intuitive and simple way to use LED CTRL and understand the output effects. Therefore we recommend that most projects start by creating a Flexi mapper to work with.
LED CTRL can have multiple Flexi Mappers within a single project file. This allows for multiple project zones or project elements to be separated out for easier to manage control as well as allows for creative effects to be applied to different representations to create alternate visual effects. It should be noted that whilst LED CTRL is primarily CPU constrained, and the number of fixtures is the key metric that determines how much CPU is required, adding multiple Flexi mappers with duplicated fixtures will also add additional CPU load and hence may impact output performance if not managed within the capability of the compute platform.
Creating a new Flexi mapper canvas
Click New Map to create a new Flexi mapper canvas. The FlexiMap settings dialog will be displayed with allows you to configure the appearance and scale of the canvas.
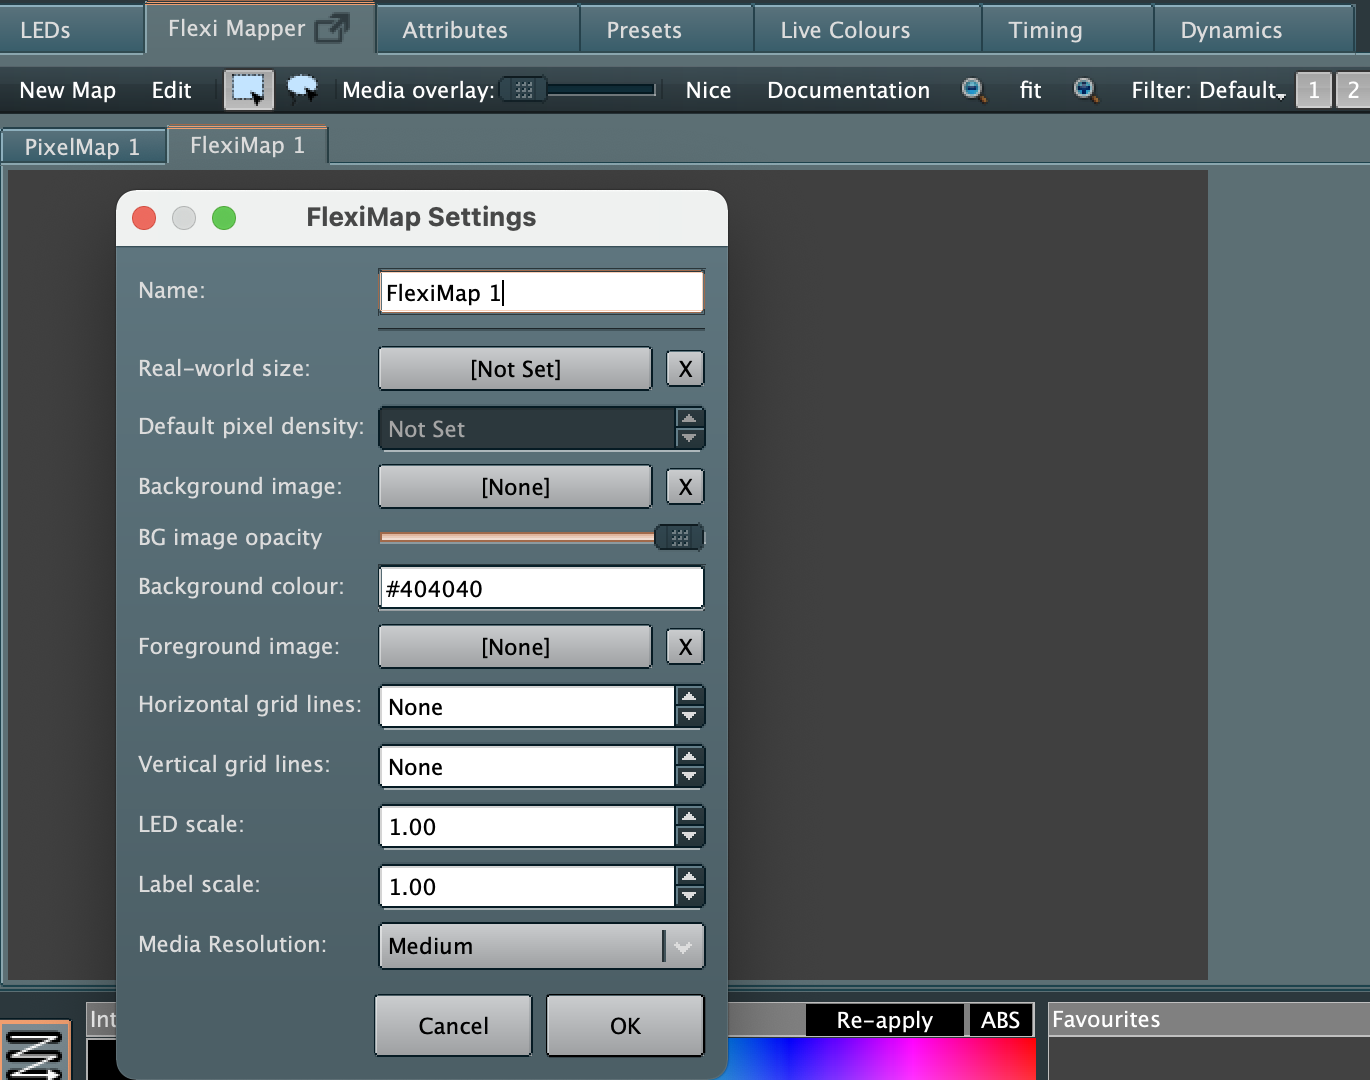
Options that can be configured here are:
- Name: the name of the canvas which will appear at the top of the canvas tab and in the documentation of the content
- Real World size: Allows an absolute measurement value for an imported image (width or height) or a scale to be applied such as A1 1to 100 for setting the scale of an imported engineering drawing
- Default pixel density: when a real world size is set, this lets you set the standard number of pixels per meter for linear fixtures (eg 10 pixels per meter is standard for many products)
- Background image: here you can choose an image file to use as a background image for the canvas to help in laying out the Pixel Group arrangements. When a background image is assigned, the aspect ratio of the canvas is adjusted accordingly and the image is placed over the entire canvas area.
- BG image opacity: reduce the opacity to improve visibility of the Pixel Group arrangements, control handles and wiring detail over the top of the background image.
- Background colour: in the absence of a background image (or if the opacity is lowered) this controls the fixed background colour. A very dark grey colour is recommended otherwise inactive LEDs would be hard to see.
- Foreground image: this lets you chose a foreground image that will mask the pixel groups - ideal for illustrating an obstruction on certain views, of even a perforated artwork. The image must be at least partially transparent in order to see any pixel groups behind it.
- Horizontal/vertical grid lines: Determines the number of horizontal or vertical gridlines that are displayed. NB the grid is always square so adjusting one value will automatically affect the other value according to the canvas aspect ratio.
- LED scale: applies a multiplier to the default LED scale to make the LEDs appear smaller or larger on the canvas. A small LED scale number suits a large scene like a building facade, a larger scale is suitable for a smaller scale scene like an internal room.
- Label scale: applies a multiplier to the Pixel Group labels scale to suit the image
- Media resolution: sets the resolution of the media for the canvas, the higher the resolution the better quality the potential output resolution - subject to having a suitable quantity of fixtures/pixels to match.
All the FlexiMap settings can be changed later if required. Once happy with the initial settings select OK to create the Flexi mapper canvas.
Adjusting the Flexi Mapper view
The Flexi Map canvas can be panned and scrolled using the mouse:
- Hold Ctrl and use the mouse' scroll wheel to zoom the view in and out
- Right click and drag to pan the view
Editing Flexi mapper settings
At anytime the Flexi Mapper settings can be edited by ensuring the Edit mode is selected and highlighted grey to show the Flexi Mapper controls. Press the Map settings button to bring up the Flexi Map settings dialog and make adjustments as required. Select OK when done.
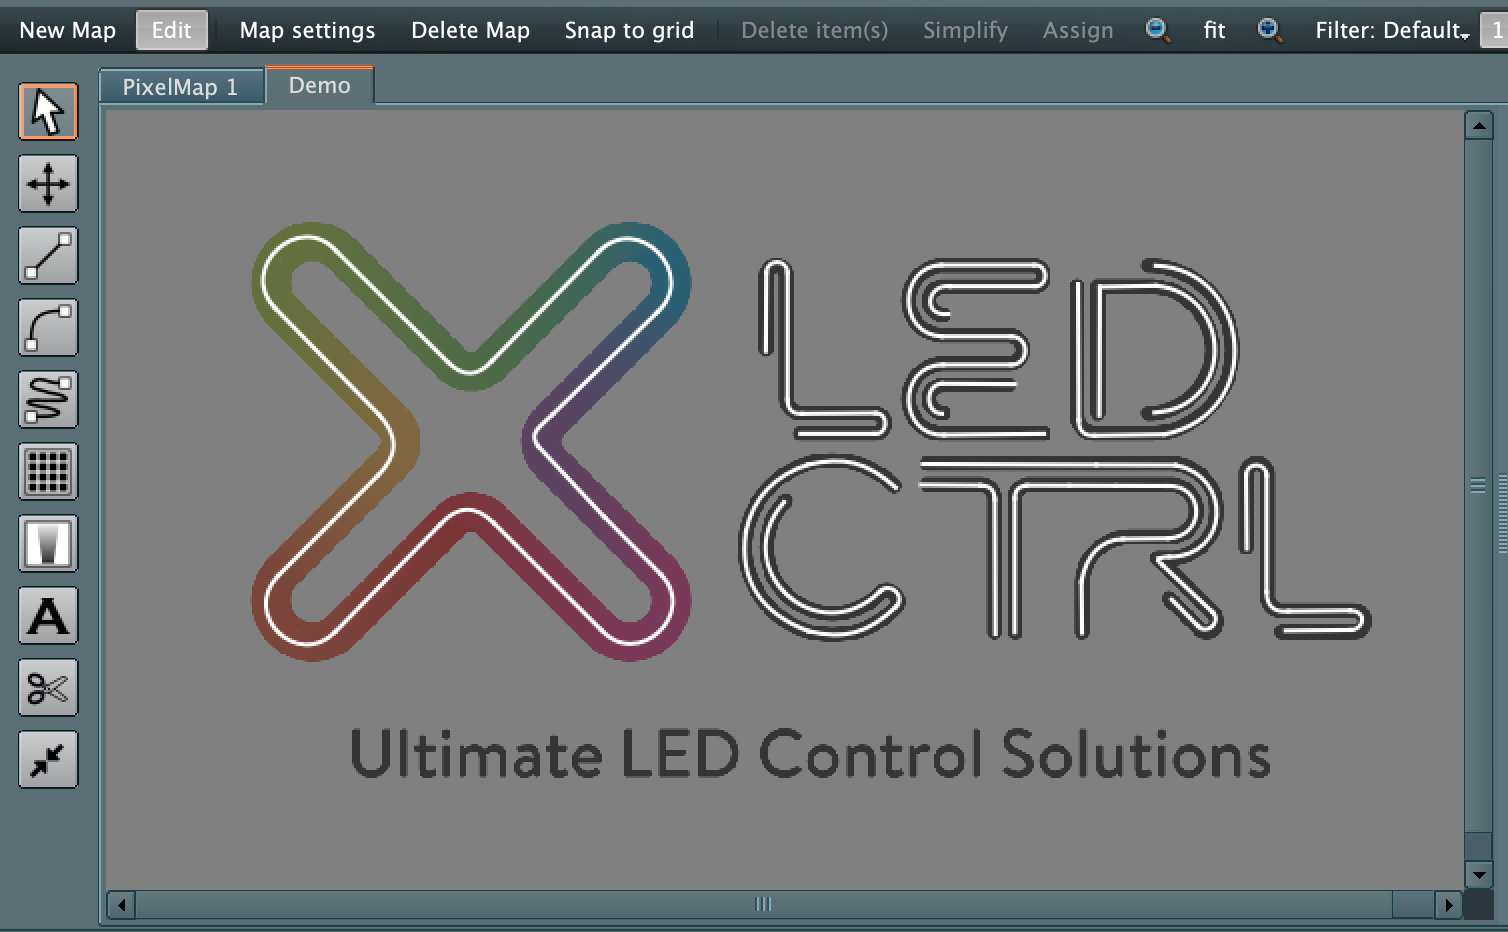
Deleting Flexi Mapper canvases
The Delete Map button (shown in Edit mode) will remove the Flexi Mapper canvas from the project but will first warn that this operation can not be undone. Select Yes to delete the FlexiMap canvas or No to keep it.

Note that this will delete the lines drawn and canvas settings, but any LEDs that were assigned on this canvas will still exist in the project. If the LEDs need to be deleted that would be done from the LEDs main window.