Selecting Fixtures
- 21 Apr 2022
- 5 Minutes to read
- Print
- DarkLight
Selecting Fixtures
- Updated on 21 Apr 2022
- 5 Minutes to read
- Print
- DarkLight
Article summary
Did you find this summary helpful?
Thank you for your feedback!
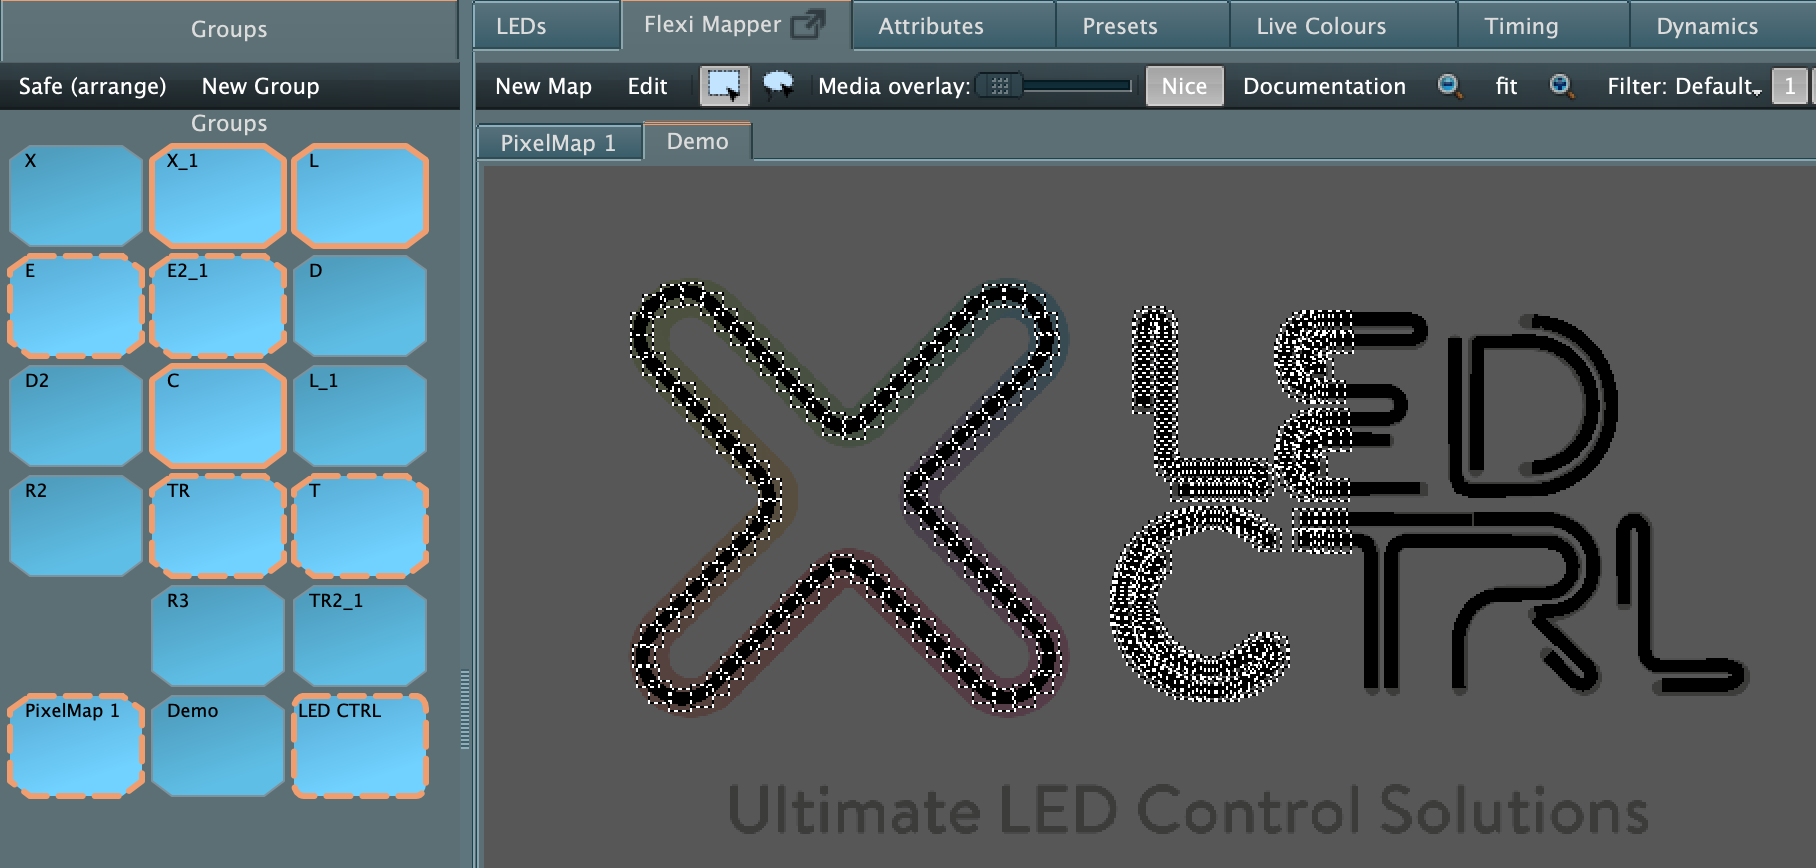
Fixtures can be selected in several ways:
- from the main LEDs window left hand pane
- from the Programmer Flexi Mapper by left clicking or lasso selection
- from the Programmer Groups pane
- or a combination of the above.

Selection order importance
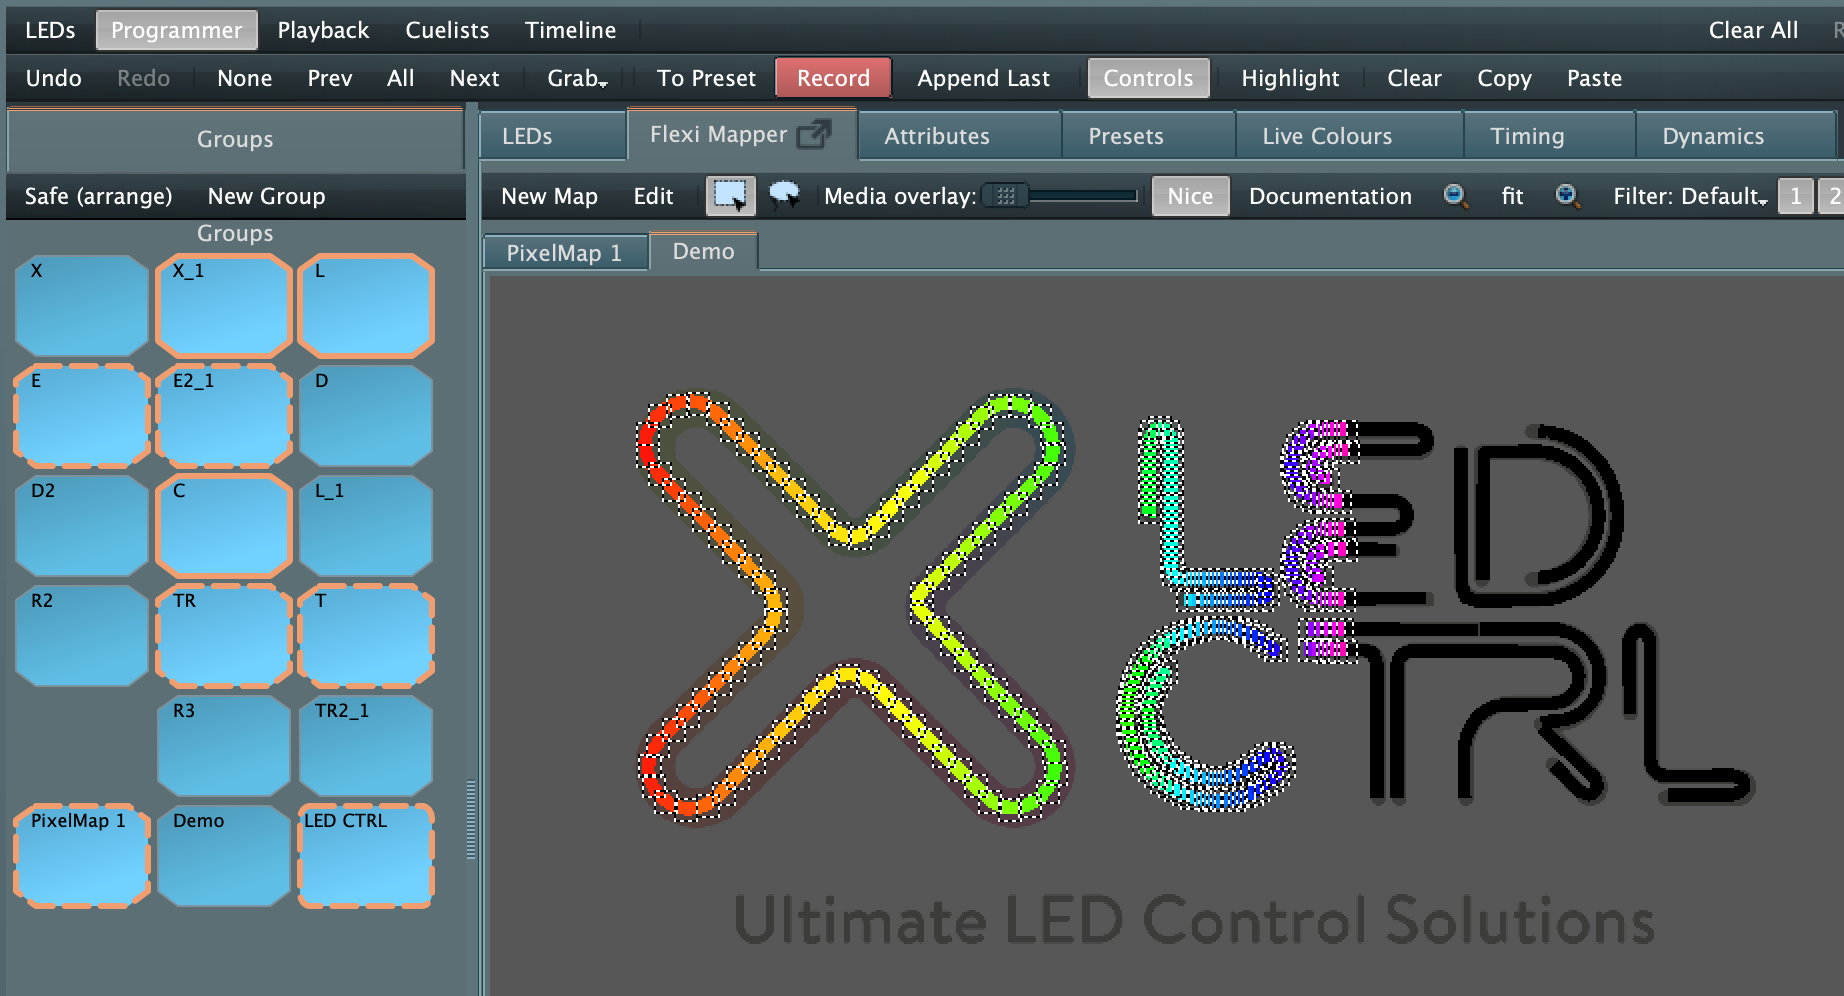
In LED CTRL the order of selection is very important as it will determine the order of application of effects to the LEDs. In the screen shots above selection was made from the Flexi Mapper using the standard rectangular lasso select. From the Flexi Mapper there is no way to see the order that the LEDs were selected in until you create an effect, but in the LEDs window above you can see that the selection looks complex. The standard lasso select, selects the pixels from left to right which means when applying a colour fan to the selection it will be applied left to right.
Note if you want to regularly apply a specific selection order it is good to save it to a new Group (in the Groups pane) to be quickly recalled.
Selection order buttons
On the left hand side of the Direct control pane at the bottom of the Programmer tab are 3 selection option buttons. When selecting fixtures, groups or pixels in succession these selection order buttons influence how the selections are treated.

Option 1: Fan across the entire selection - this treats the selections as one continuous selection. For 3 lines selected in order with a colour fade applied the impact is shown below.
Option 2: Fan each group independently - a fan will be applied to each element across the full fan. So each element will start and end on the same colour.
Option 3: Fan each group independently and uniformly - a fan will be applied to each element but will only apply the full fan to the longest length. Shorter lines will only show a pro rate portion of the fan depending on the proportion of their length compared to the longest line.
The three options will produce the following outcomes...
Option 1: Fan across entire selection :

Option 2: Fan each group independently :

Option 3: Fan each group independently and uniformly :

Alternate lasso selection options
To have an alternate selection order from the standard rectangular left to right selection, press and hold CTRL/Command as you make the rectangular selection, when you un-click to complete the selection an option dialog will allow you to select the selection order
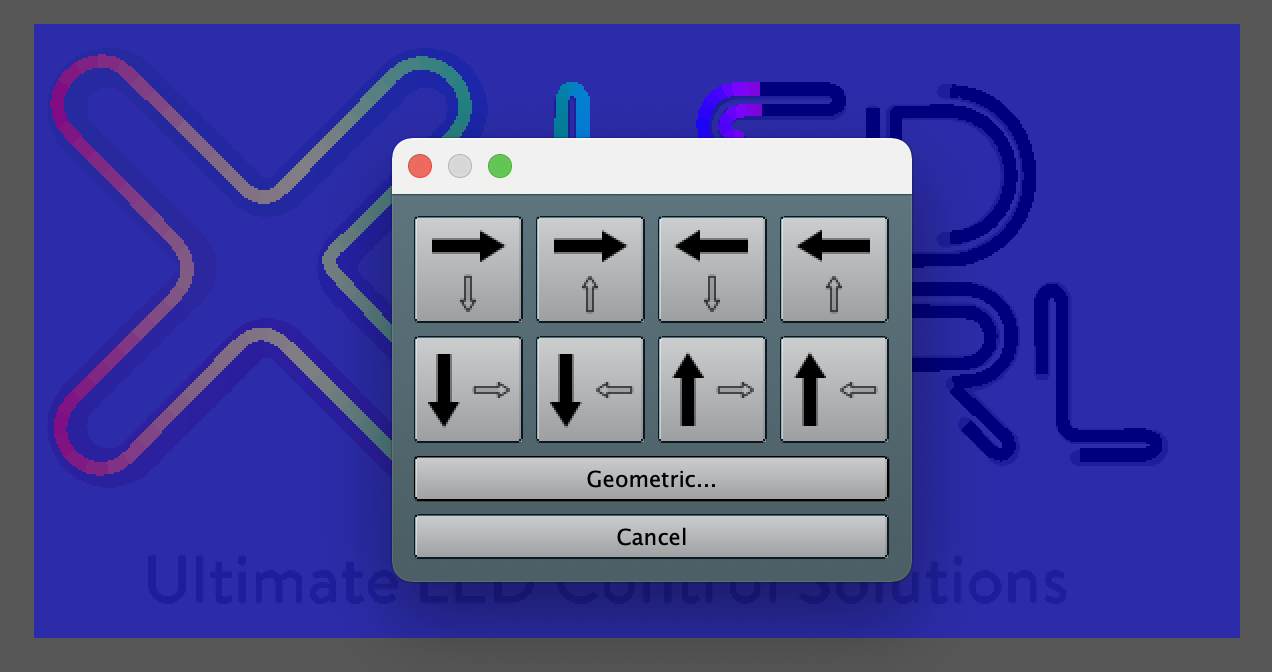 If you select one of the arrow options the option box will immediately close and the selection order selected will be applied.
To apply a geometric selection order select the Geometric button to open the Geometric selection tool.
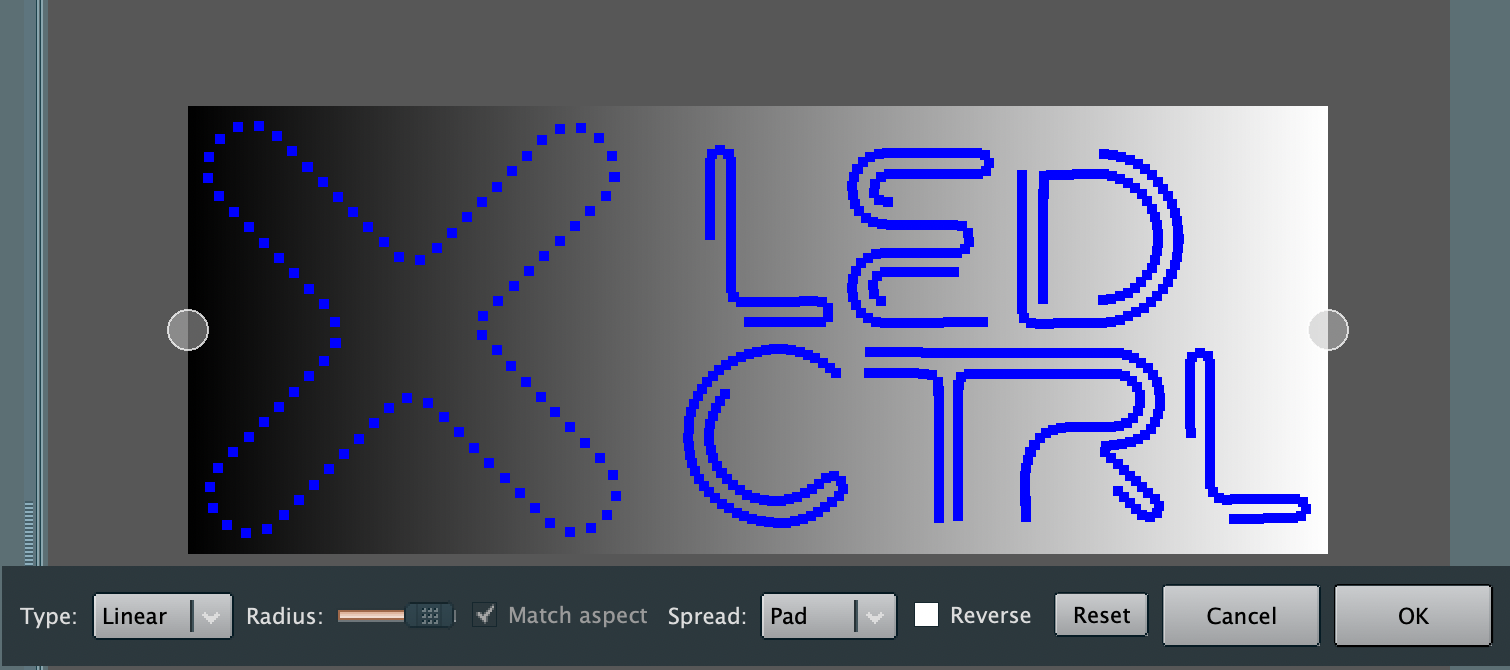
Within the Geometric selection tool you can select options for:
- Type: Linear, Radial, Conical and adjust the control handles (shown as circles on the left and right above).
- The Radius slider sets the scale of the applied pattern.
- The Match aspect tickbox toggles between the aspect of the Flexi Mapper or the selection box.
- The Spread options are: Pad, Reflect and Repeat. Adjusting these options along with the Radius slider creates some interesting selection patterns.
- Reverse inverts the selection pattern.
- Reset updates all values to the default for the currently selected Type.
When happy with you Geometric selection pattern select OK to apply the selection or Cancel to ignore.
An example radial selection order is shown here along with the applied fan effect.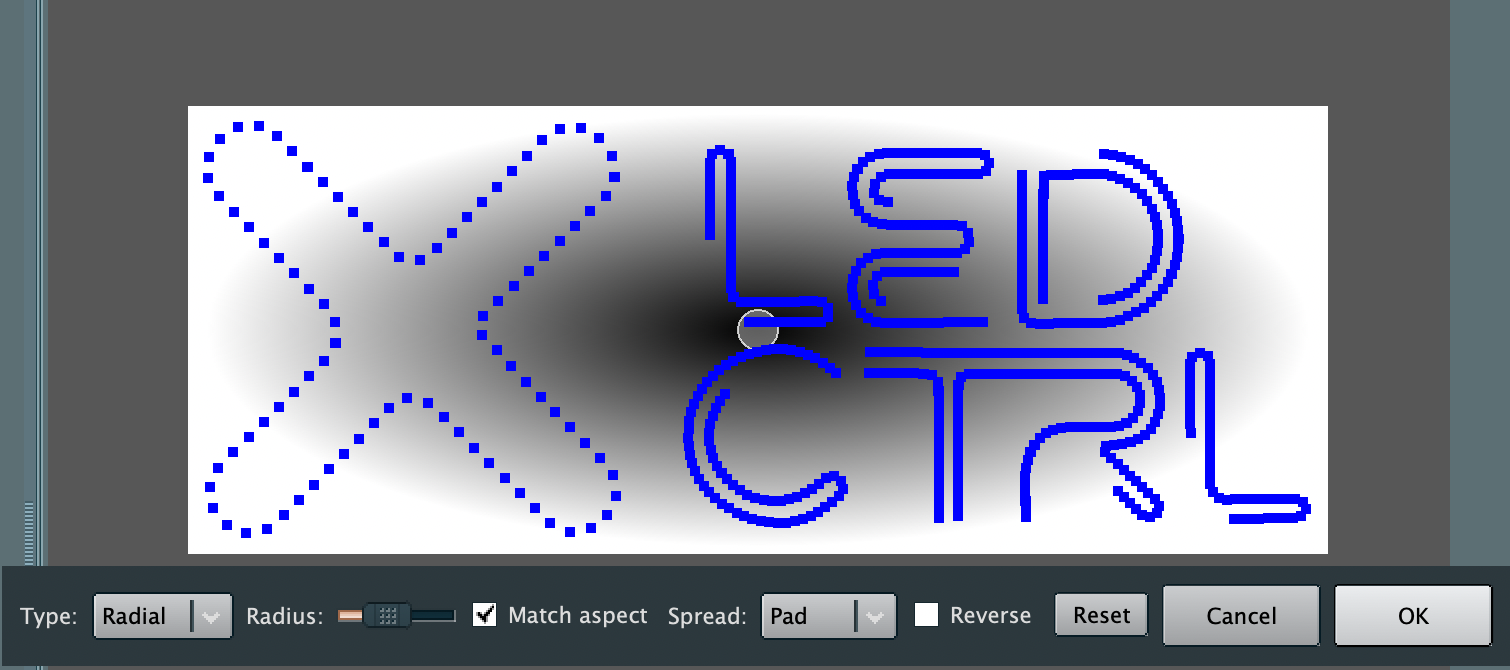

Selecting individual pixels
![]()
Once you release the left click to complete the selection the pixels will turn white to show they are selected and selection order will be enforced.![]()
Adding more pixels to a selection
To add more pixels to an active selection either click on the item in the Flexi Mapper, main LEDs window the Group object. The selected item will be added to the end of the selection. Note that if you click away from selections, such as apply a colour the selection order will apply but you cannot add to it. To add to it, reselect it (ideally by selecting the Group of fixtures for your saved selection) and then adding the new elements to the end.
Removing pixel groups from a selection
Using the groups pane, pixel groups can be removed from an active selection by right clicking on the pixel group to exclude and selecting the De-activate option. The group will be removed from the selection.
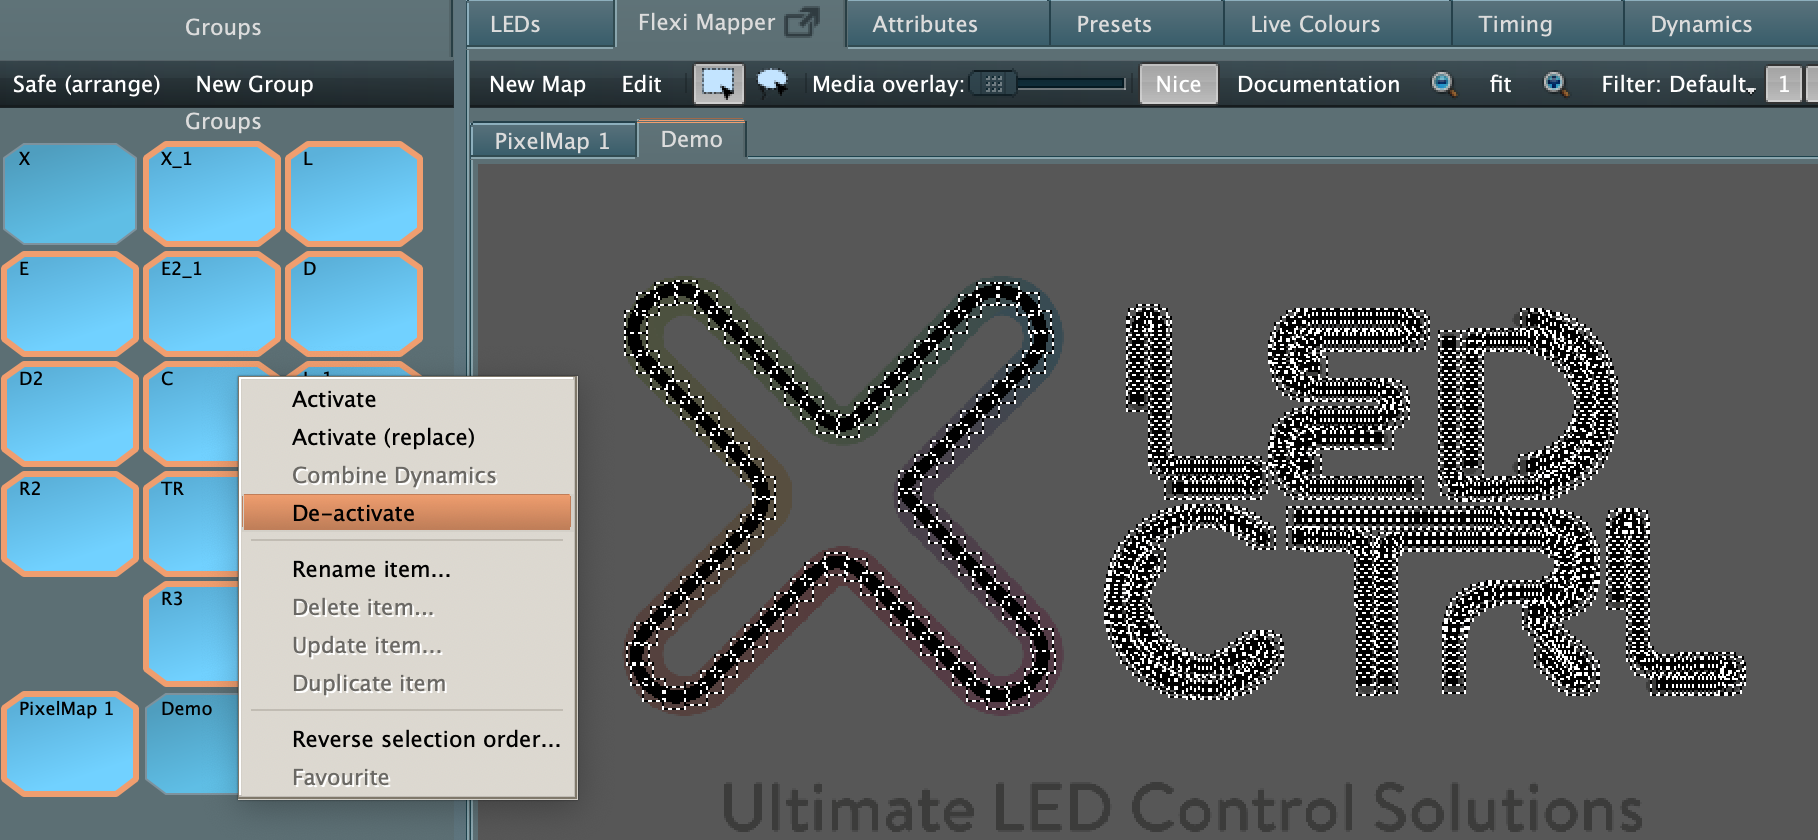
The pixel group can be re-added by right clicking again and selecting the Activate option, but it will now be last in the selection order.
Changing the selection to one pixel group
To replace the selection with one fixture only or one group only, right click on the desired group and select Activate (replace). This will deselect all previously selected fixtures and select only the newly selected object. this is the same as just left clicking the pixel group.
Refining the selection
Once a selection is made, it can be further refined using the LEDs tab of the programmer main canvas. Selecting objects and then the LEDs tab provides the following view.
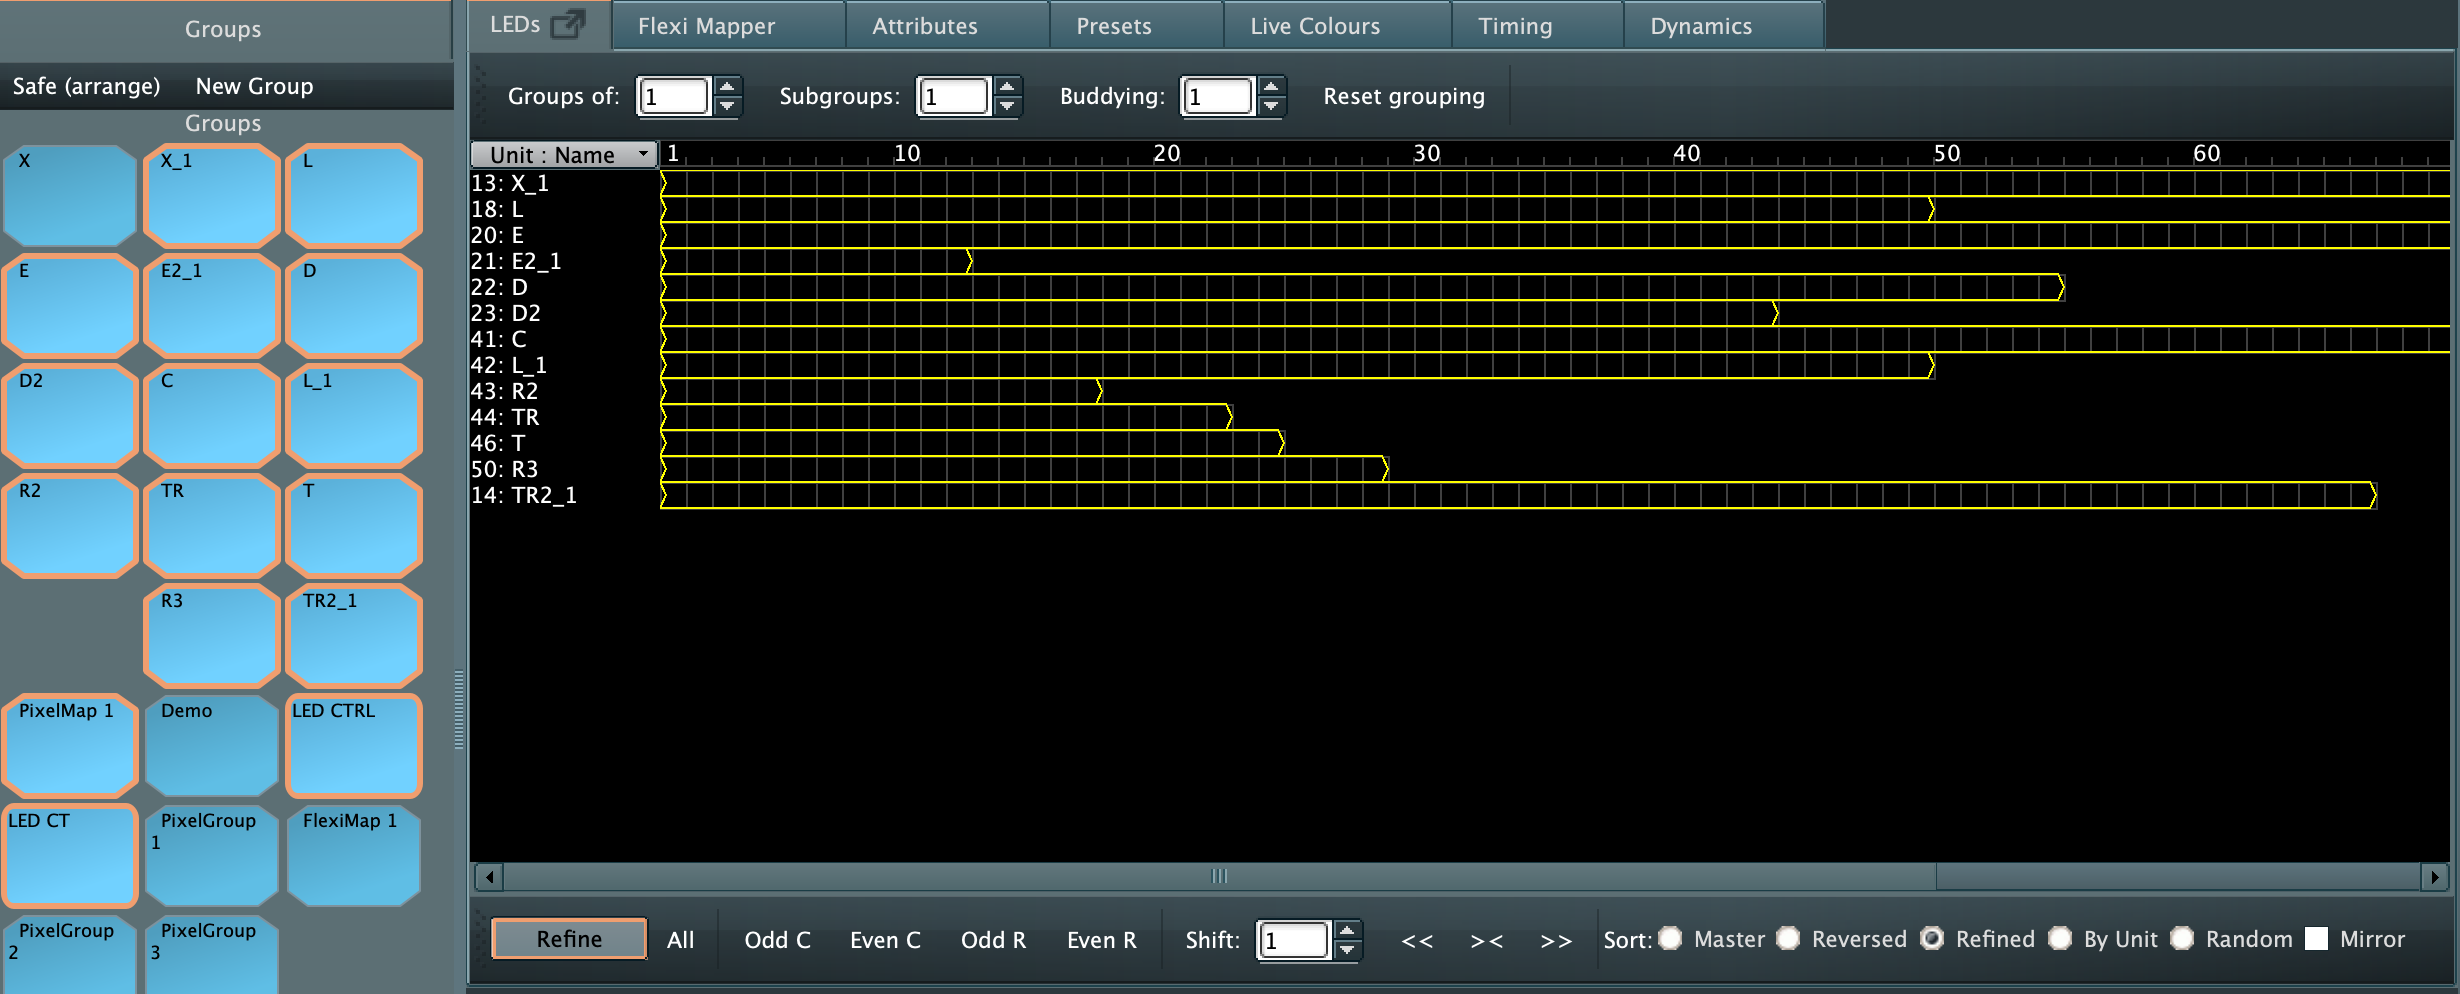
The grouping options at the top of the pane provide the following options:
- Groups of - groups all the pixels selected into groups of x pixels. Overwrites subgroups selection.
- Subgroups - divides the selection into x of groups. Overwrites Groups selection
- Buddying - treats x number of pixels as one
The Refine button alternates between showing all LEDs and just those currently selected. When in the Refined mode, only the selected pixels are displayed and the refinement options are available. This allows for the following options:
- All - reselects the original selection to remove all refinements and show all LEDs
- Odd Columns - selecting odd columns repeatedly steps through one at a time, so 1 on 1 off, then 2 on 2 off, 3 on 3 off etc
- Even Columns - selecting even columns repeatedly steps through one at a time, so 1 on 1 off, then 2 on 2 off, 3 on 3 off etc
- Odd Rows - selecting odd rows repeatedly steps through one at a time, so 1 on 1 off, then 2 on 2 off, 3 on 3 off etc
- Even Rows - selecting even rows repeatedly steps through one at a time, so 1 on 1 off, then 2 on 2 off, 3 on 3 off etc
- Shift pixel start - by selecting the number of pixels to shift by the start pixels can be moved left or right using the << and >> buttons, or reset to the start using the >< option
- Sort Master
- Sort Reversed - reverses the selection
- Sort Refined - reapplies the selection to as it was when entering Refined mode
- Sort By Unit - simplifies a complex selection by fixture group
- Sort Random - randomises the selection
- Sort Mirror - selects the pixels in a mirror order from each end of the selection to the centre.