Media Controls
- 01 Aug 2022
- 3 Minutes to read
- Print
- DarkLight
Media Controls
- Updated on 01 Aug 2022
- 3 Minutes to read
- Print
- DarkLight
Article summary
Did you find this summary helpful?
Thank you for your feedback!
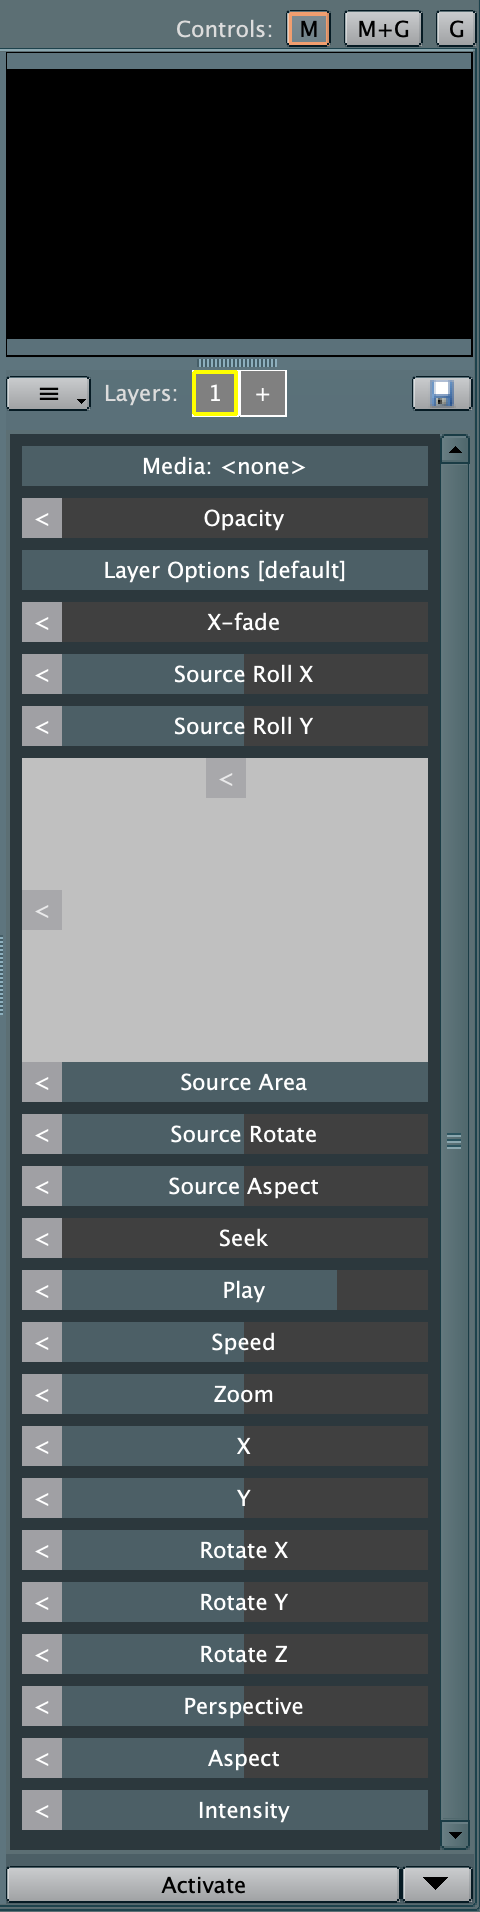
The Media Controls pane is at the right of the Programmer window within the Flexi Mapper tab. It can be used to apply media to the Flexi Mapper canvas. The pane size can be adjusted by left clicking on the dividing line between the media pane and the Flexi Mapper canvas and dragging it right or left.
The Media Control allows mapping of video or images, media generated effects and NDI input to allow media streaming input. Unlike Direct Control where LED CTRL has many different ways of applying direct effects to LEDS, Media can not be mapped to LEDs via any other method in LED CTRL than the Media Control pane.
Any applied media image or video can be manipulated using the many control options including zoom, position, rotation, perspective, aspect, media speed, media start point, source area manipulation and more. All of these options can not only be set, but also dynamically modified to vary with an amplitude, modification profile and rate to suit the desired effect.
Adding Media to a Flexi Mapper
To add media to be applied to a Flexi Mapper canvas select the Media: <none> button at the top of the Media Control set of buttons. The Choose Effect / Media window will be displayed.
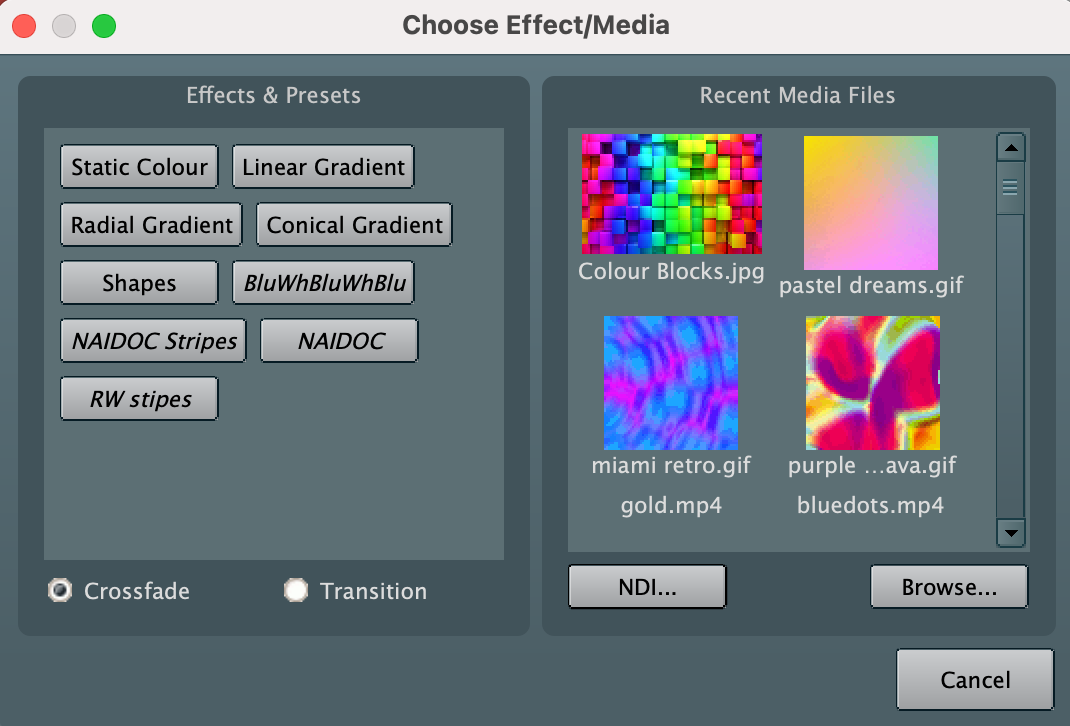
From the right hand panel, either select one of the recent media files shown or click Browse to locate media on your device and select Open. The selected media will be shown in the source window of the Media Controls, about halfway down the pane.

In order to apply the media to the Flexi Mapper, increase the Opacity setting from the default 0 position to something higher (typically 100%). You can either do this by left click and drag within the Opacity control, in which case you will see the blue coloured bar indicating the level of Opacity. Or you can hold the CTRL/Command key which will show additional control buttons within each media control.
These additional controls include an X and R on the left for all media controls and an additional ! on the right for the Opacity control only.
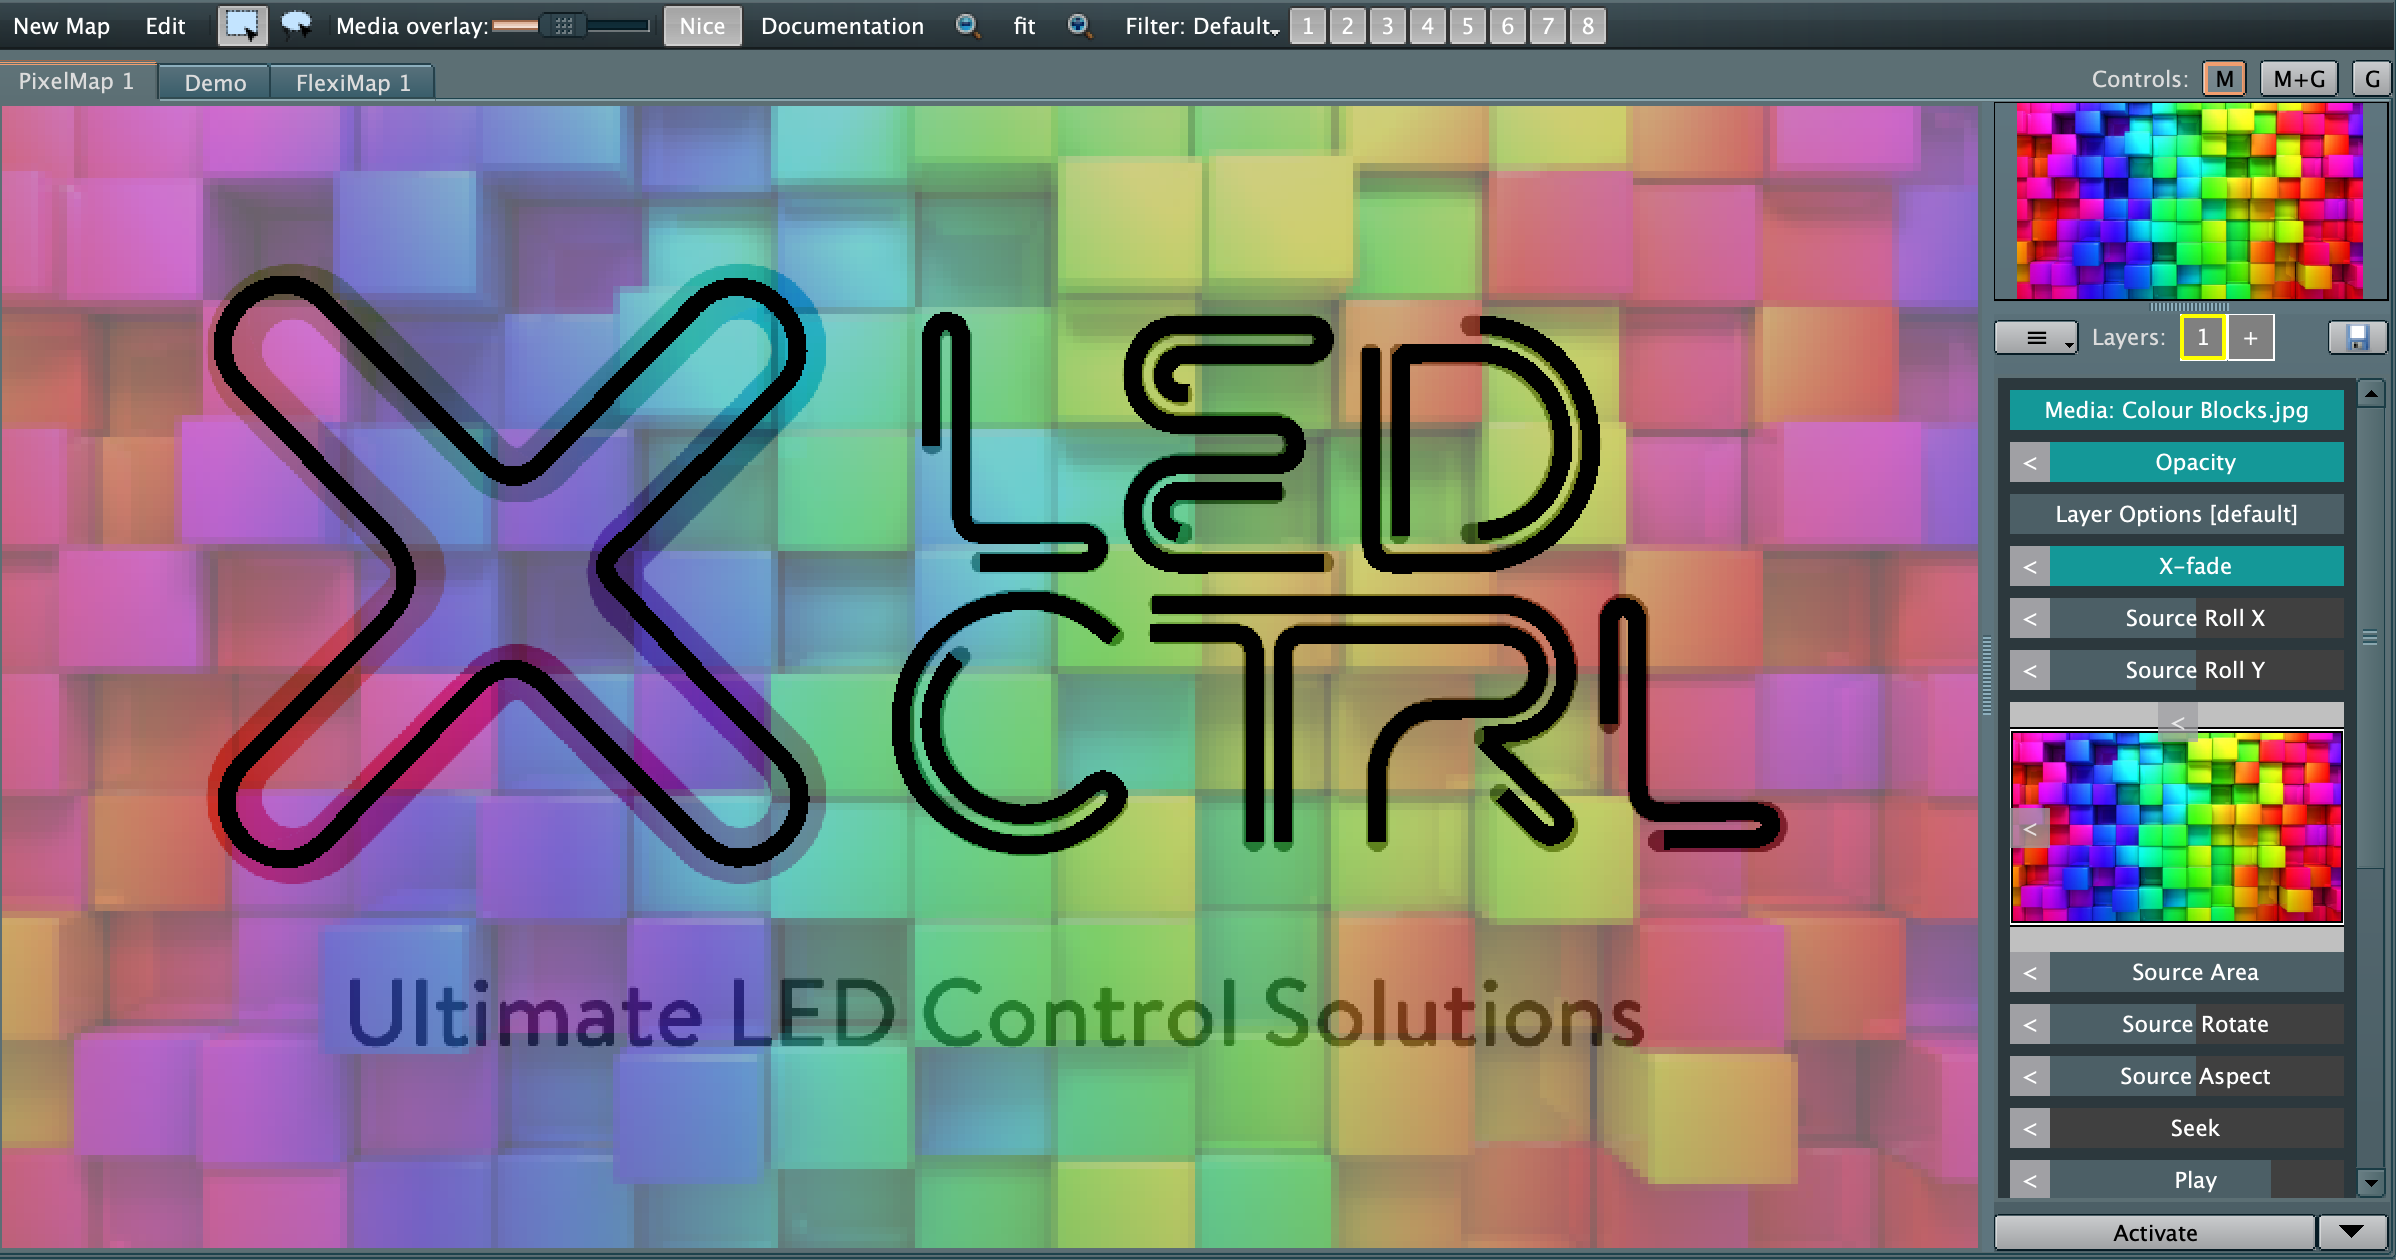
Whilst still holding the CTRL/Command key, select the ! button to set the Opacity to 100% directly. The impact of the Opacity for the canvas is reflected in the applied media view at the top of the Media Control pane.
The X button for all the controls removes the control element from the programmer. The R button Resets the control element to its default position and remains in the programmer.
Whilst the applied media view is a quick visual for what is being applied to the canvas, the best way to see the impact of the applied media is to apply the Media overlay at the top of the Flexi Mapper canvas via the slider. This will show how the media is positioned on the canvas and relative to the pixel groups assigned.
At this stage the media is applied to the canvas, but the LEDs are not yet impacted. In order to drive the LEDs they need to be activated.
Activate LEDs to reflect media mapping
If you want to activate the media across all pixel groups on a canvas, simply select the Activate button at the bottom of the Media Controls pane. The LEDs will reflect the colour of the media at each point on the canvas as can be seen below.
There are additional activation options available by using the drop down option to the right of the Activate button. To enable activation of only selected pixels select the Activate - selected pixels only option.
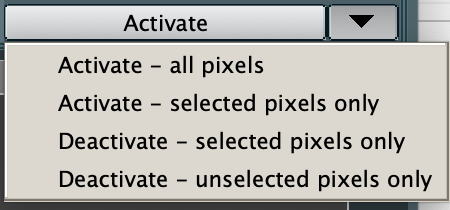
Deactivate LEDs from media mapping impact
By using the drop down option to the right of the Activate button you can chose to deactivate either selected pixels, or unselected pixels. The remaining pixels will still be activated for media mapping.