Getting Started
- 07 Nov 2022
- 4 Minutes to read
- Print
- DarkLight
Getting Started
- Updated on 07 Nov 2022
- 4 Minutes to read
- Print
- DarkLight
Article summary
Did you find this summary helpful?
Thank you for your feedback!
Starting LED CTRL
To start LED CTRL, double click on the LEDctrl icon from its installed location. When you start LED CTRL, it prompts you to load a project..png)
- Clicking Last Project loads the last project that was saved.
- Clicking Open shows a standard file navigator allowing you to select any project.
- Clicking Recent opens a drop down box containing your most recent projects.
- Clicking New Project starts a new project.
LED CTRL's top toolbar has tabs allowing you to switch between the main windows of: LEDs, Programmer, Playback, Cuelists and Timeline. All of these windows and their functions are described in detail in their relevant sections of this manual.
These windows are un-dockable to suit multi-monitor set-ups or multiple windows. Double clicking on a tab will un-dock the window allowing it to be either re-sized and repositioned (large monitor recommended), minimized or dragged to another monitor when using multiple monitor set-ups. Closing an un-docked window will automatically re-dock it to the main display.

Right clicking on a greyed out name of an un-docked window gives you two options: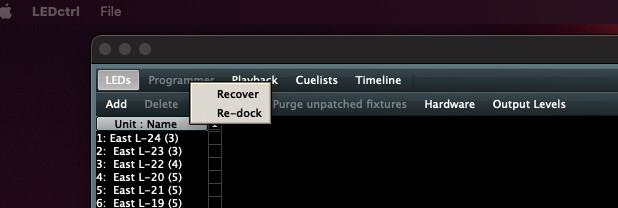
Recover - Moves the undocked window to the front if it was hidden.
Re-dock - Re-docks the window.
The right end of the top toolbar has buttons for Clear All, Release All and DBO.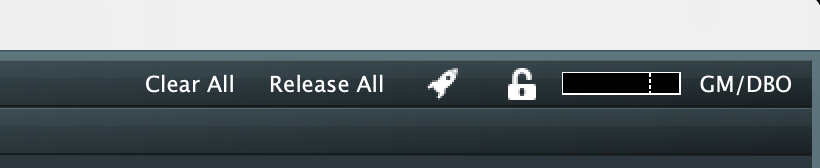
- Clear All clears all fixtures from all Programmers.
- Release All releases all fixtures from all Playbacks.
See the full Programmer section for more details on Clearing and Releasing.
- DBO (Dead Black Out) instantaneously blacks out all fixtures. This is a momentary action. When the button is released, all output is instantly restored.
- GM (Grand Master). When you hover the mouse over the DBO button, the Grand Master (GM) appears. You can click on 0 (Black Out) or 100 (Full level) or drag the virtual fader to set an overall intensity level. The DBO button flashes red if the Grand Master is set to any level below 100%. It stays red when the Grand Master is set to 0%.
Basic Operation
The basic steps in controlling lighting fixtures are:
- Add LEDs to be controlled - this can be done via the LEDs screen, the Fleximapper in the Programmer window or via CSV upload.
- Select and attributes to the LEDs - this can be done in the Programmer window via many means such as using direct control (colour picker and attributes), Direct FX, media mapping, media generation, Dynamics and timing, NDI input etc
- Record the fixture attributes values to a Cuelist
- Playback of the Cuelist
A brief description of each step is provided here. For more detail on each function please refer to the full descriptions in the main user guide.
Adding new LEDs (Pixel Groups)
You can choose to either add Pixel Groups first and assign them to a Fleximapper canvas later or you can create new Pixel Groups directly from the Flexi Mapper view. Here's a quick look at both methods.
Adding Pixel Groups from the LEDs window
Select the LEDs top level window and click the Add button:
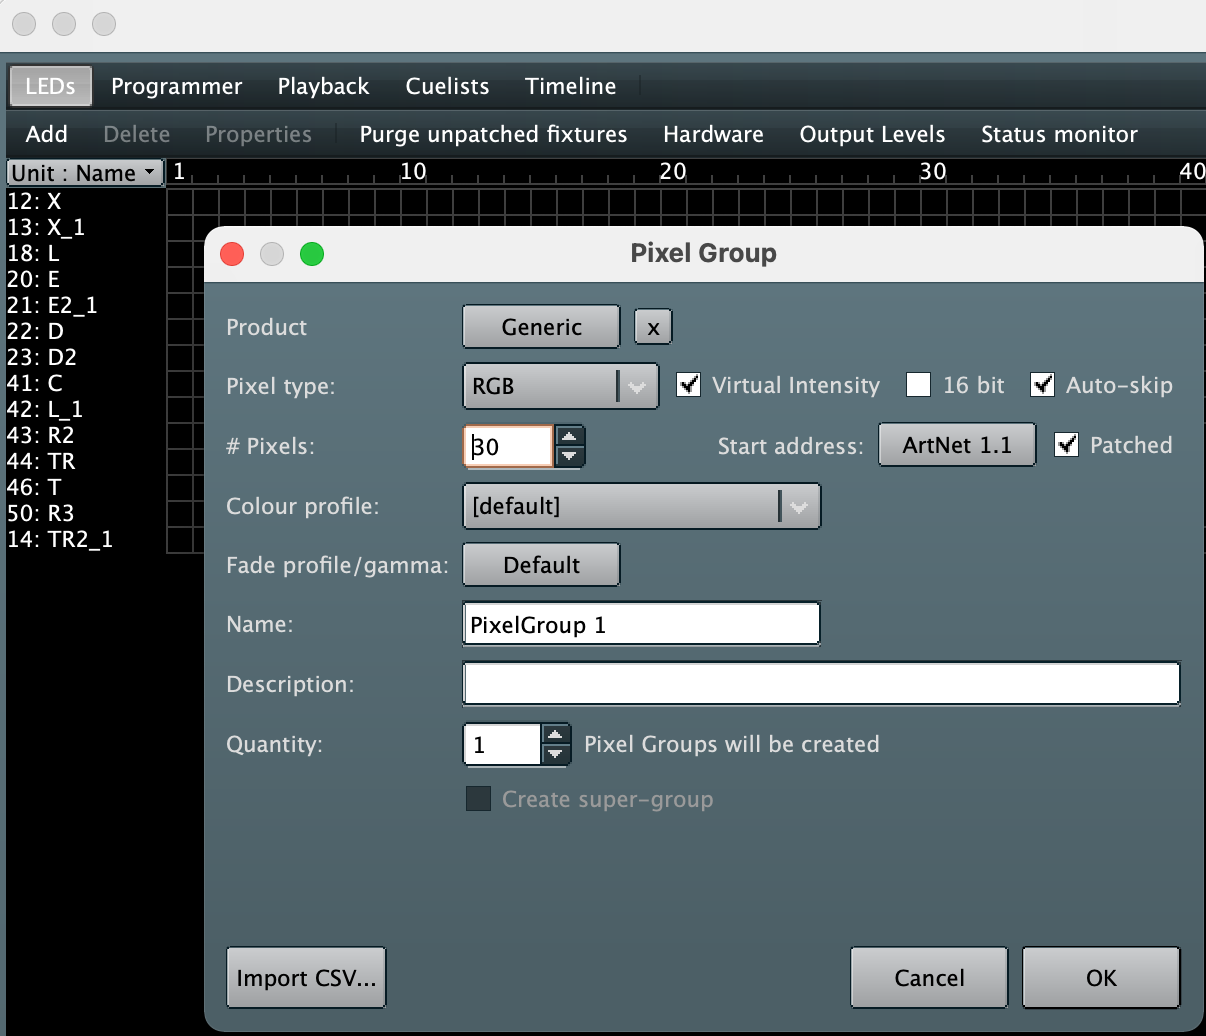
- Pixel type: allows you to choose the pixel type and channel order (e.g. RGB, RGBA, BGR etc.)
- Virtual intensity: when checked this will include a non-patched intensity channel for each pixel in the group.
- High resolution: this option will assign 2 channels for each colour component instead of 1 channel (e.g. RRGGBB instead of RGB).
- # Pixels: sets the number of pixels in the group
- Start address: click this to quickly set the patch address for the Pixel Group (note you can keep default if not controlling lights or if you plan to use the integration with LED CTRL hardware)
- Patched: controls whether the Pixel Group will be actively patched (outputting data) or not.
- Quantity: if you want to quickly add a number of Pixel Groups of the same size & type.
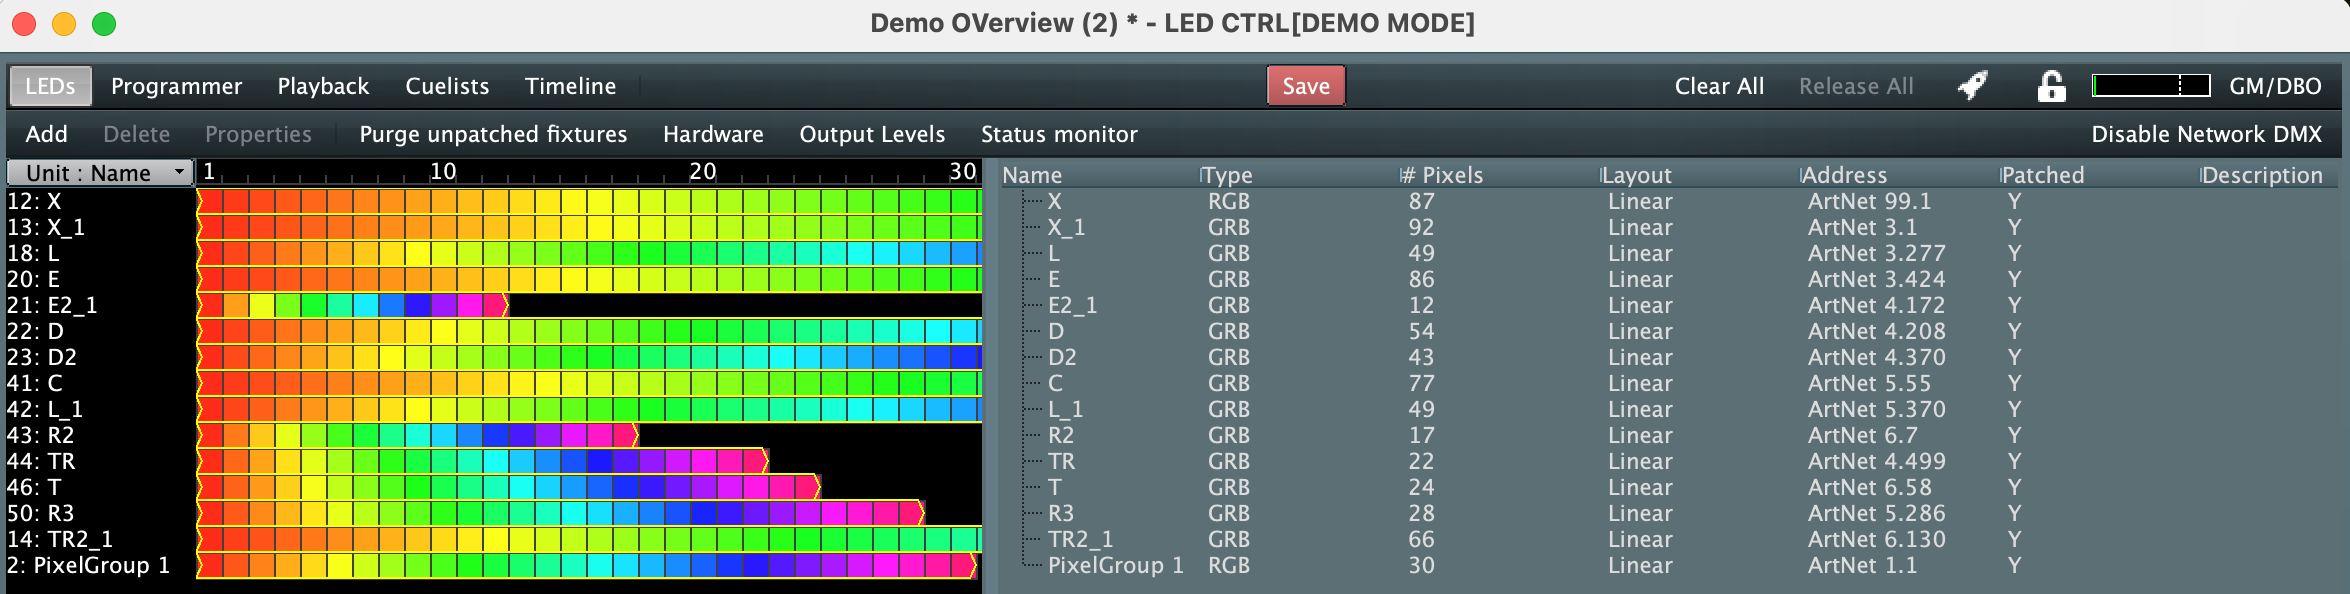
The LEDs window gives you an overview of all the Pixel Groups that are in the current show as well as their current output activity:
Adding Pixel Groups from the Flexi Mapper
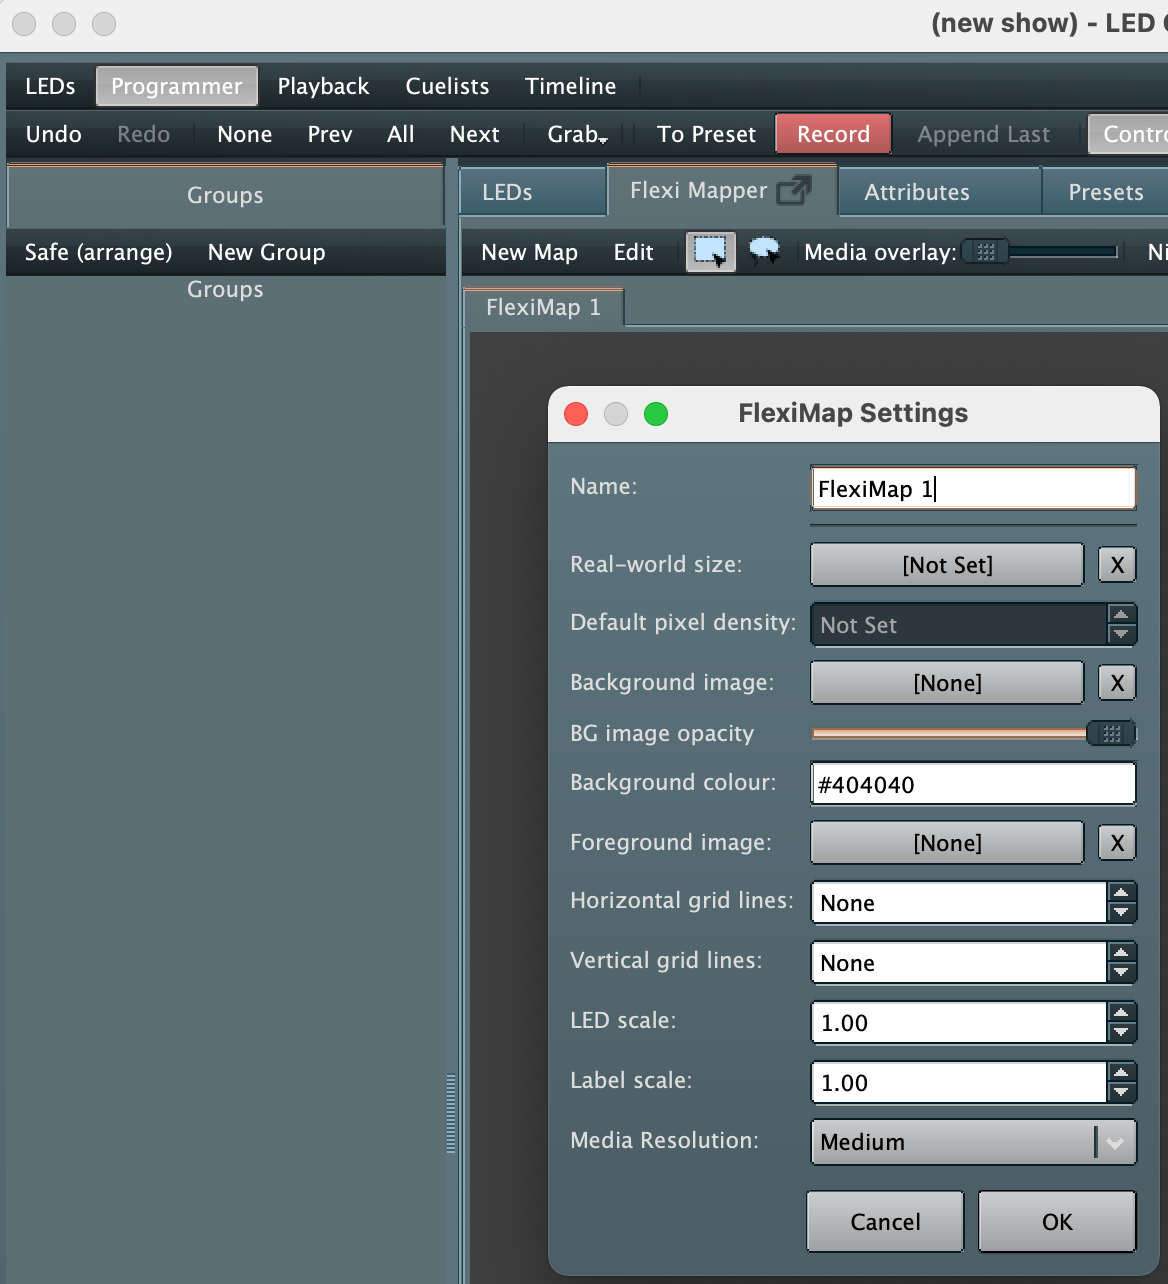
Select the Programmer top-level window and on the Flexi Mapper tab click New Map. Note that a background image can be brought in to provide a guide for your project but it's not required. Select OK to accept all default settings.
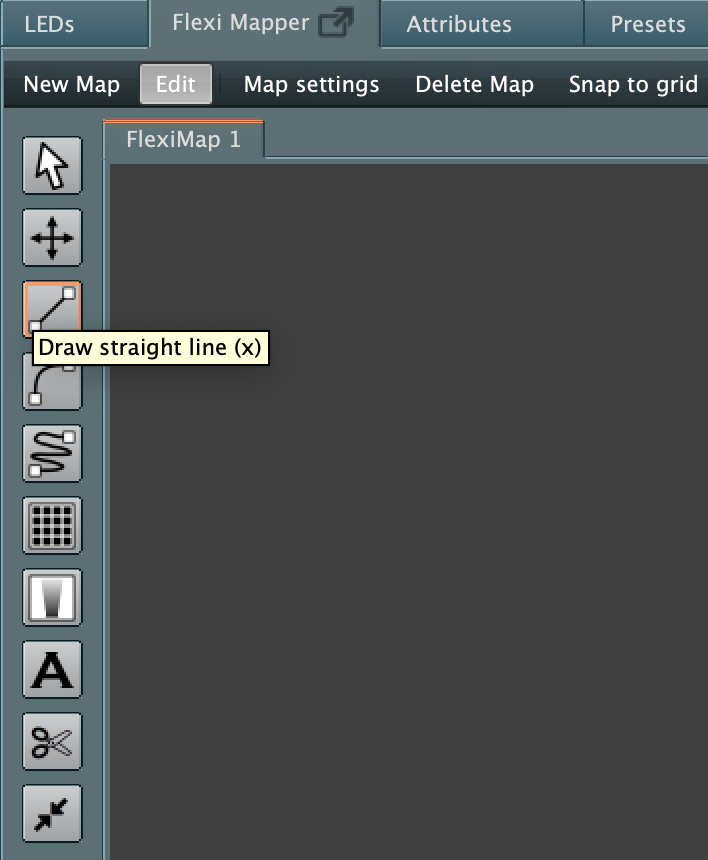
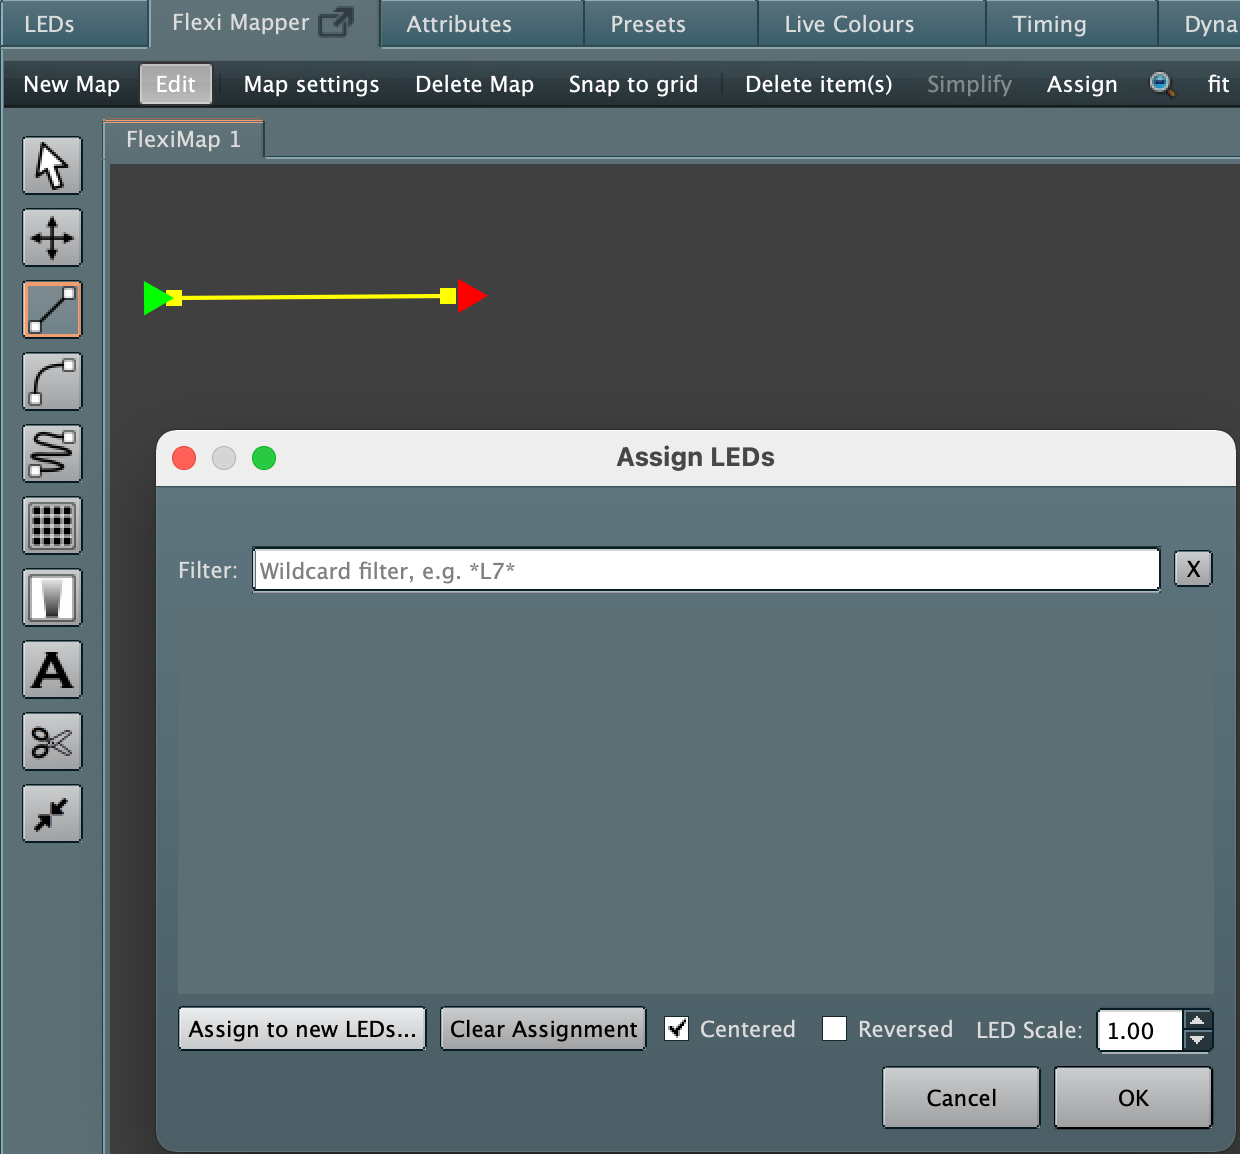
Ensure ‘Edit’ is enabled then click ‘Draw straight line’ and drag on the canvas to place a new line:
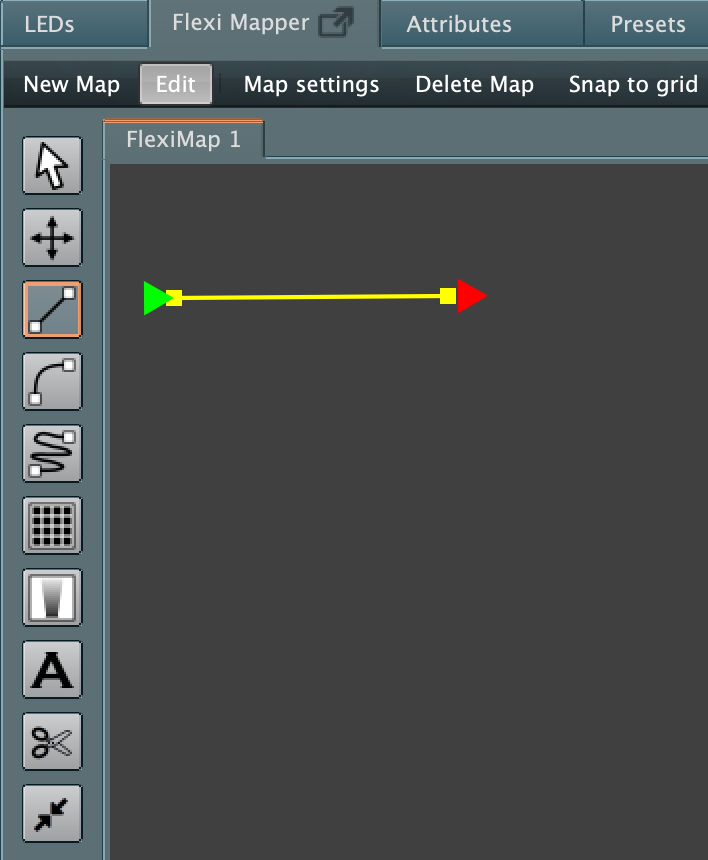
With the new line still selected (in yellow), right click on Assign LEDs:
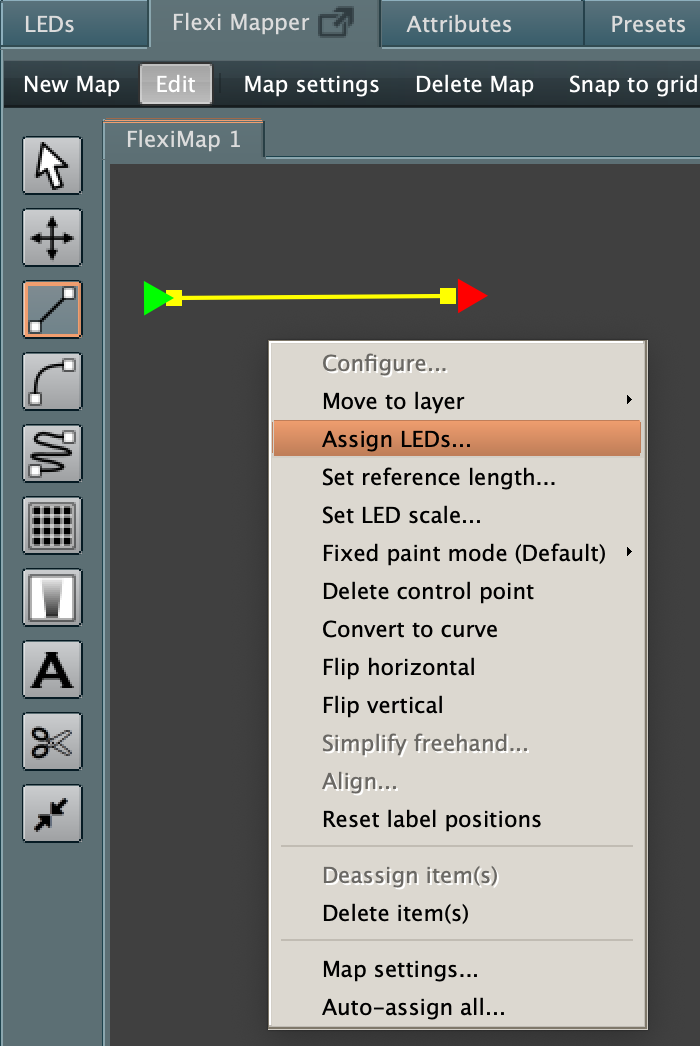
And then click on ‘Assign to new LEDs…’ to display the Pixel Group dialog described above.
Set the Pixel Group parameters as described above, then clicking Done creates the Pixel Group and completes the assignment.
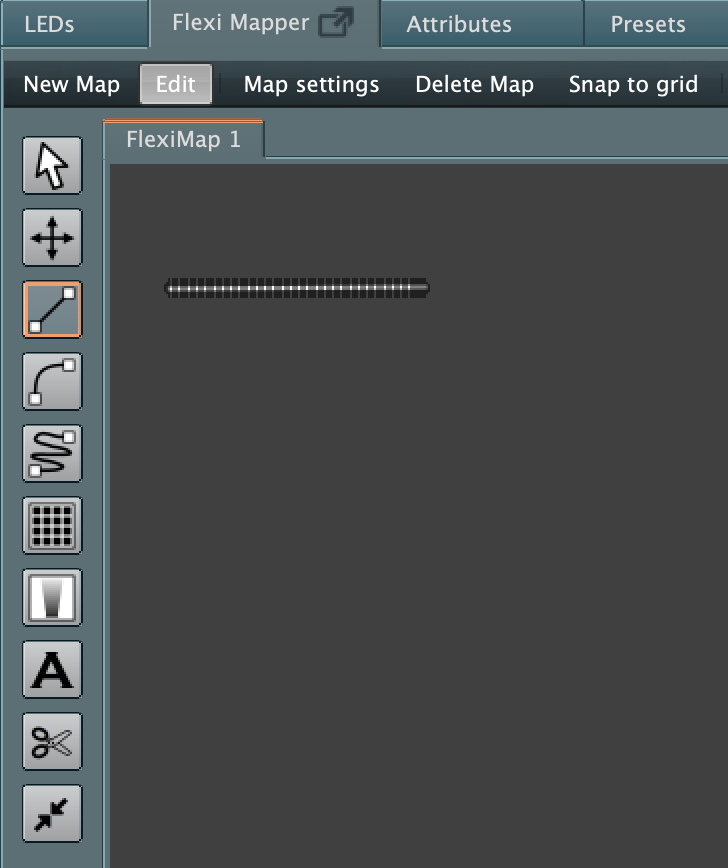
Select Edit to come out of Edit mode and hide the Fleximapper editting tools.
Setting the LEDs to a colour
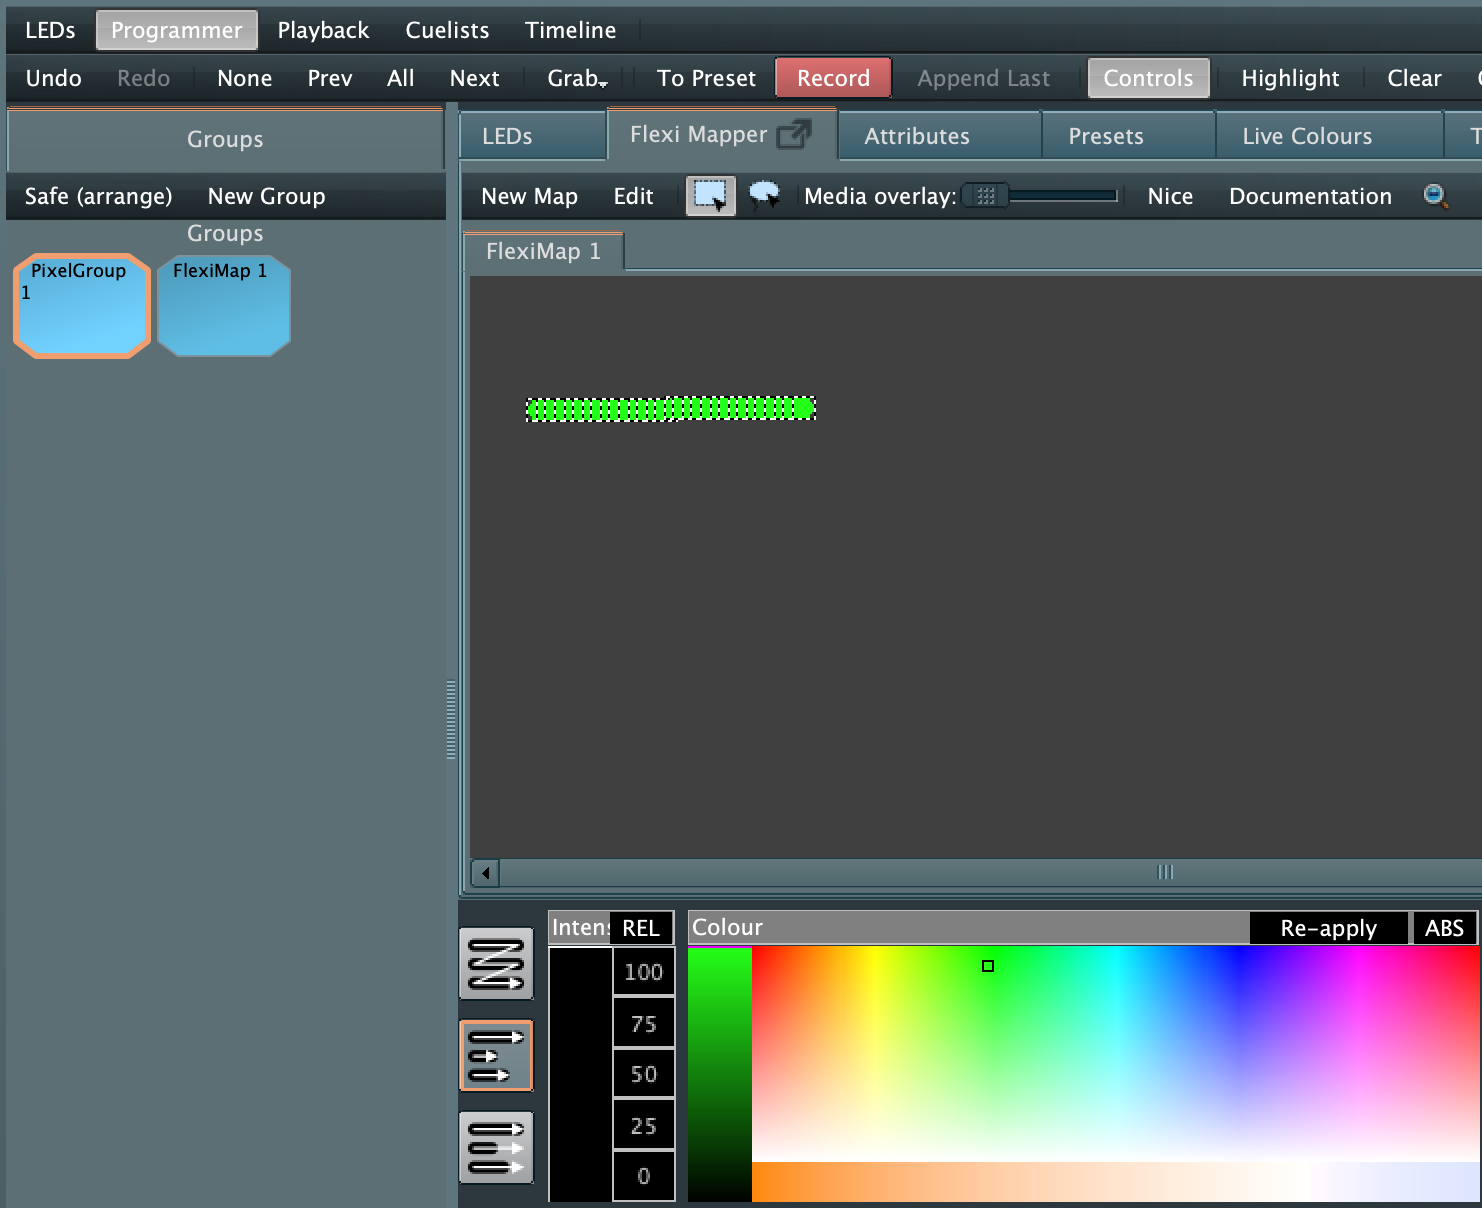
Select the line with a single left mouse click or a lasso select and select a colour from the colour picker:
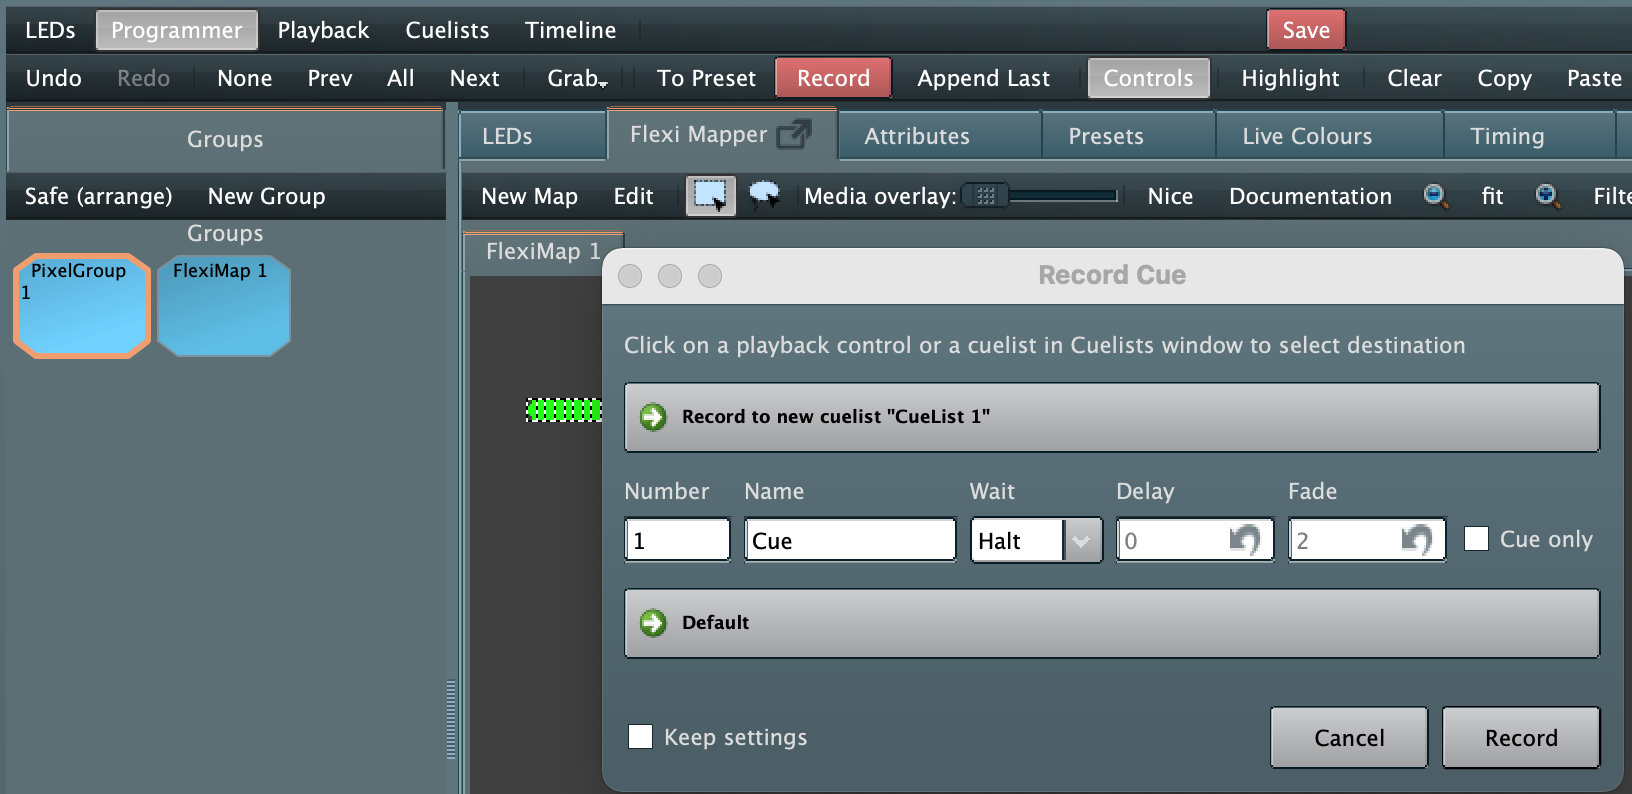
Recording the effect
Then select the red Record button. Keep all defaults and select Record to create a new cuelist and record this look as the first cue in that cuelist.
Select another colour and select Append Last to add the effect as a second cue to the cuelist.
Clear down the programmer by selecting Clear All from the top menu bar.
Playing the recorded effect
The effects can now be played back from the Cuelist window by selecting the Cuelist and selecting the small Play button to the right of the Cuelist name. Selecting Play again plays the next cue in the cuelist.

Turn the lights off by selecting the Release All option from the top menu bar.