Direct Controls
- 21 Apr 2022
- 4 Minutes to read
- Print
- DarkLight
Direct Controls
- Updated on 21 Apr 2022
- 4 Minutes to read
- Print
- DarkLight
Article summary
Did you find this summary helpful?
Thank you for your feedback!
The Direct Controls pane is at the bottom of the Programmer window. It can be used to quickly directly control the attributes colour and intensity of all selected fixtures. These controls work with any type of fixture that has been selected. This control area can be turned on and off by toggling the Controls button second menu bar at the top of the main window. 
Note Direct Controls can also be applied through the Attribute, Presets, Live Colours and Dynamics tab of the Programmer which provides many more functions. See each respective section for more detail on direct control from there.
The Direct Control pane has the following functions:
- Selection Order buttons - functionality is covered in the Selection order section
- Intensity Control
- Colour Picker
- Colour Favourites window
- Direct FX
Intensity Control
The intensity control can be operated in Relative or Absolute mode. The mode is toggled by selecting the REL or ABS at the top of the intensity control area.
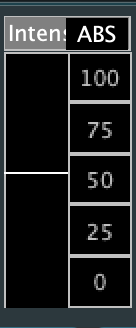
When a selection is active and the Intensity control is in Relative mode, the Intensity Control right hand column can be used to quickly set the intensity of the selection to one of the 0%, 25%, 50%, 75% or 100% options. The left hand column will reflect the value set.
When a selection is active and theIntensity control is in Absolute mode, the Intensity Control left hand column can be used to quickly set the intensity of the selection to any value. The indicator acts a slider to drag up and down.
You can also fan the intensity across the selection by holding the CTRL/Command key and left click and drag from start intensity position to end intensity position and release the left click.
To see the exact value selected, select the Attributes tab on the Programmer window.
Colour Picker Control
The colour picker control can be operated in Relative or Absolute mode. The mode is toggled by selecting the REL or ABS at the top of the colour picker control area.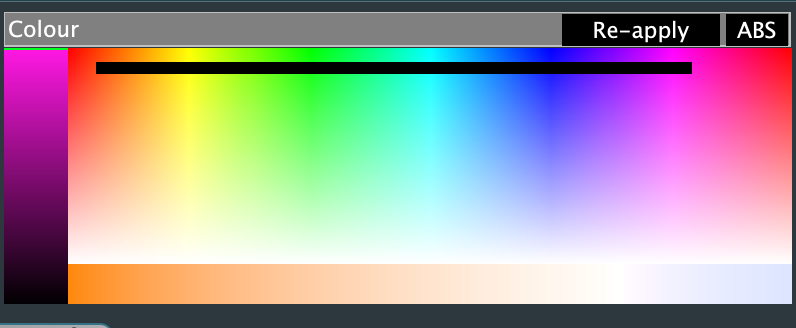
When a selection is active and the Colour Picker control is in Absolute mode, selecting a point on the Colour Picker Control can be used to quickly set the colour of the selection to any value. The selected colour is highlighted with a Black square.
You can also fan the colour across the selection by holding the CTRL/Command key and left click and drag from start colour position to end colour position and release the left click.
When a selection is active and the Colour Picker control is in Relative mode, left clicking and dragging in the colour picker box moves the selected colour relative to the already selected colour. holding Shift while moving the mouse in this box makes the adjustment finer for more accurate control. This relative mode is particularly good where you have a fan or similar and can then simultaneously adjust all the colours - say to move a vibrant rainbow to a pastel rainbow.
To see the exact value selected, select the Attributes tab on the Programmer window.
Selecting the Reapply button when in Relative mode sets the colour back to the values prior to any relative adjustment.
Colour Favourites
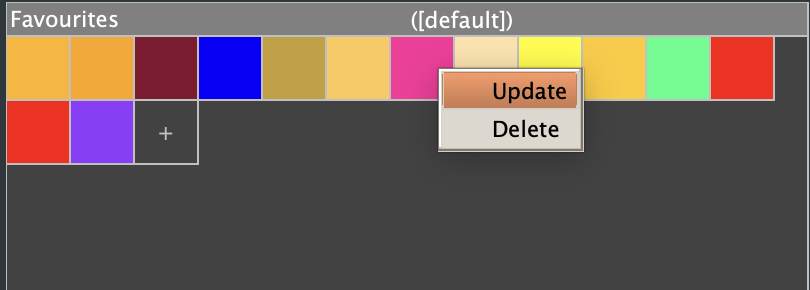
The Colour favourites control allows for colours selected from the Colour picker to be added to the favourites area.
To add a favourite - select a colour from the colour picker and select the + button at the end of any already saved values. The colour value will be added to the available options.
Favourite colours can be updated by selecting a new colour from the Colour Picker control in Absolute mode and then right clicking the favourite to be updated and selecting the Update option.
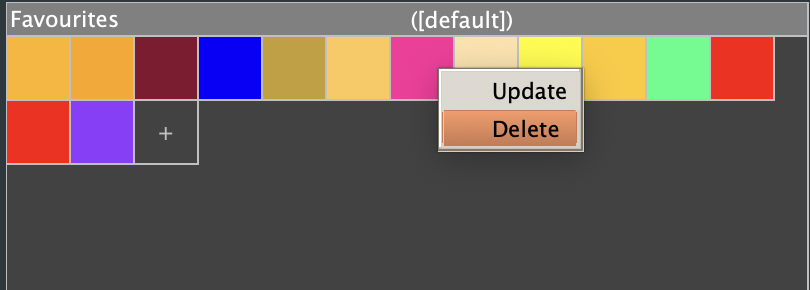
Favourite colours can be deleted by right clicking the favourite to be deleted and selecting the Delete option.
Direct FX
Selecting the Direct FX button on the right hand side of the Direct Control pane switches the controls to Direct FX mode. (Selecting the Control button toggles the view back to the intensity and colour controls).
A number of prebuilt Direct FX are available by default. There are 3 intensity effects: Intensity Chase, Intensity Ripple, Intensity Wave and 5 colour chases: Rainbow, RGB Chase, RGB Ripple, RGB Uber and Swirl.
Selecting a Direct FX effect from the left hand options shows the parameters for that option. The RGB Chase Direct FX defaults are shown here as an example

Each of the Direct FX has different adjustable options. When a selection is active, selecting the Activate button will apply the Direct FX to the selected pixels. While the selection remains active adjusting any of the controls will instantly impact the selected pixels. Although sometime is it hard to see the effect with the pixels selected, so the best options is to ensure you have a group for your selection, then click away from the selection to see the effect and reselect the group and re-Activate the effect with new parameter settings.
If you have a Direct FX that you want to use regularly with particular settings (not the default) then you can save the effect as a user defined Preset FX by clicking the Save button (floppy disk icon) on the top right of the Direct FX window. You will prompted to give the effect a name.  Set the name and select OK to save the effect which is then added to the Direct FX prebuilt options.
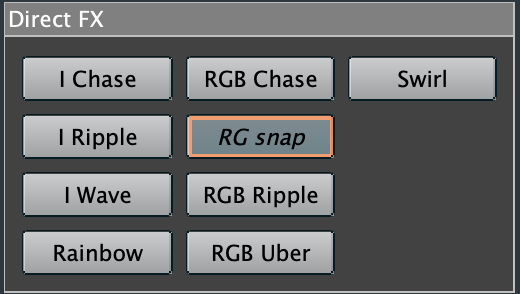
Note that Direct FX effects are created using Dynamics. By activating an effect and then selecting the Dynamics tab you can see how the Direct FX was constructed and it can be a good learning for how to use Dynamics.