Adding objects to a Flexi mapper
- 02 Jul 2024
- 6 Minutes to read
- Print
- DarkLight
Adding objects to a Flexi mapper
- Updated on 02 Jul 2024
- 6 Minutes to read
- Print
- DarkLight
Article summary
Did you find this summary helpful?
Thank you for your feedback!
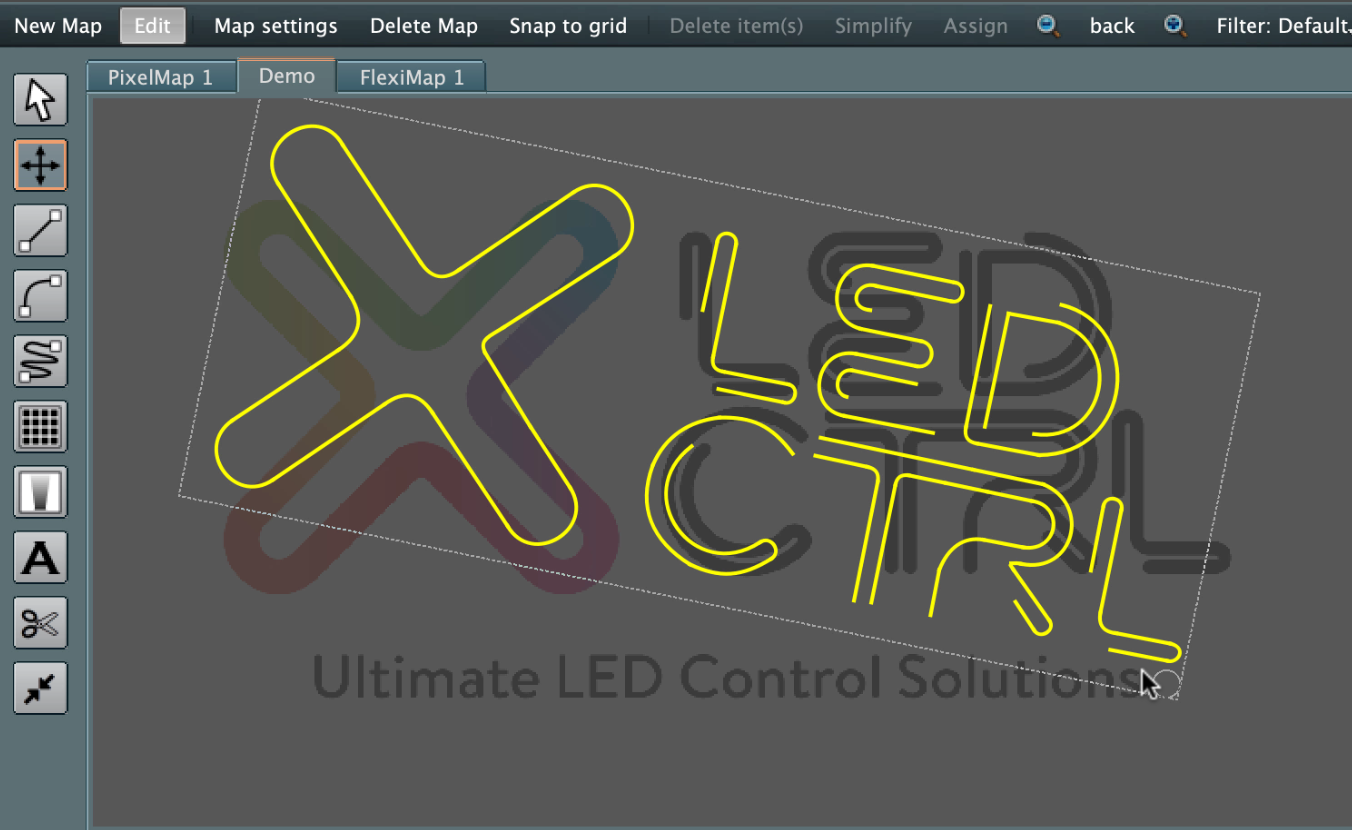
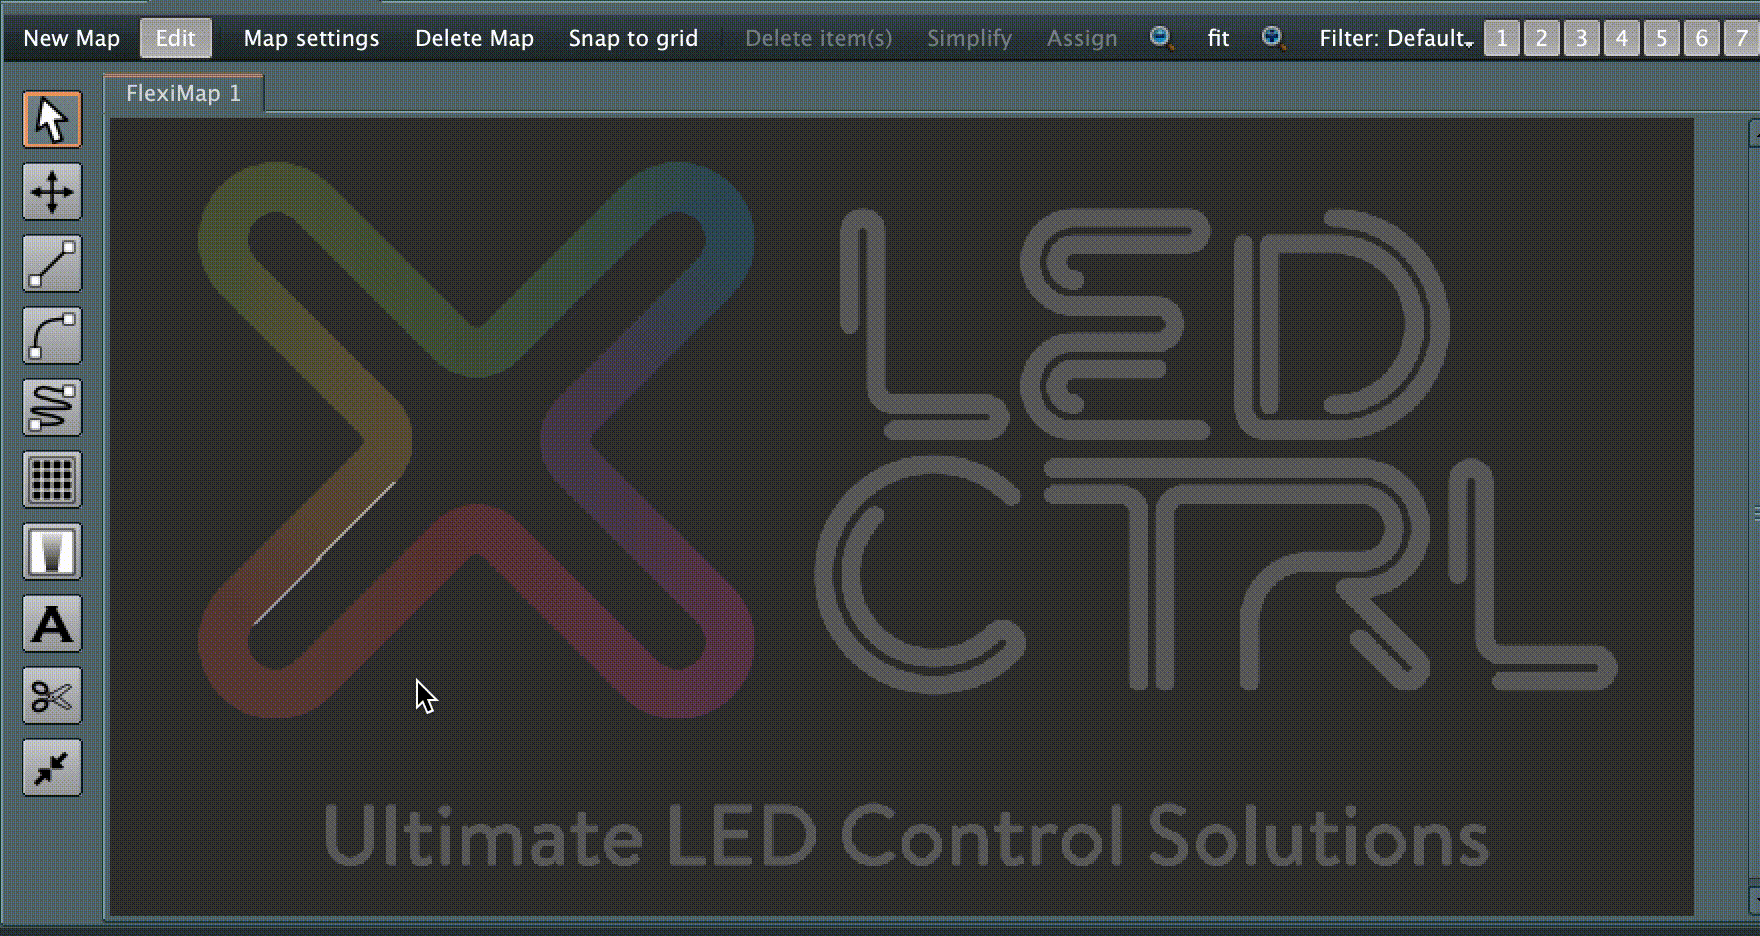
When a Flexi Map is newly created it is initially in Edit mode. This is the mode that allows additions and changes to the fixtures displayed on the Flexi Map. If not already in Edit mode, enter edit mode by selecting the Edit button. The button will highlight grey and the Flexi Mapper tools will be displayed on the left hand side of the main Flexi Mapper canvas. Note to exit Edit mode again you select the Edit button again so it is no longer highlighted.
From top to bottom the tools available in Flexi Mapper edit mode are:
- Selection tool: (shortcut v)
- Move/Resize tool: (shortcut m)
- Straight line tool: (shortcut x)
- Curved line tool:(shortcut c)
- Freehand draw tool:(shortcut f)
- Mesh tool:
- Grazer tool:
- Text tool:
- Split lines tool:(shortcut s)
- Join lines tool:(shortcut j)
Adding a straight line
Ideal for linear fixtures, the straight line and curved line tools let you layout your project easily to suit any 2D linear design.
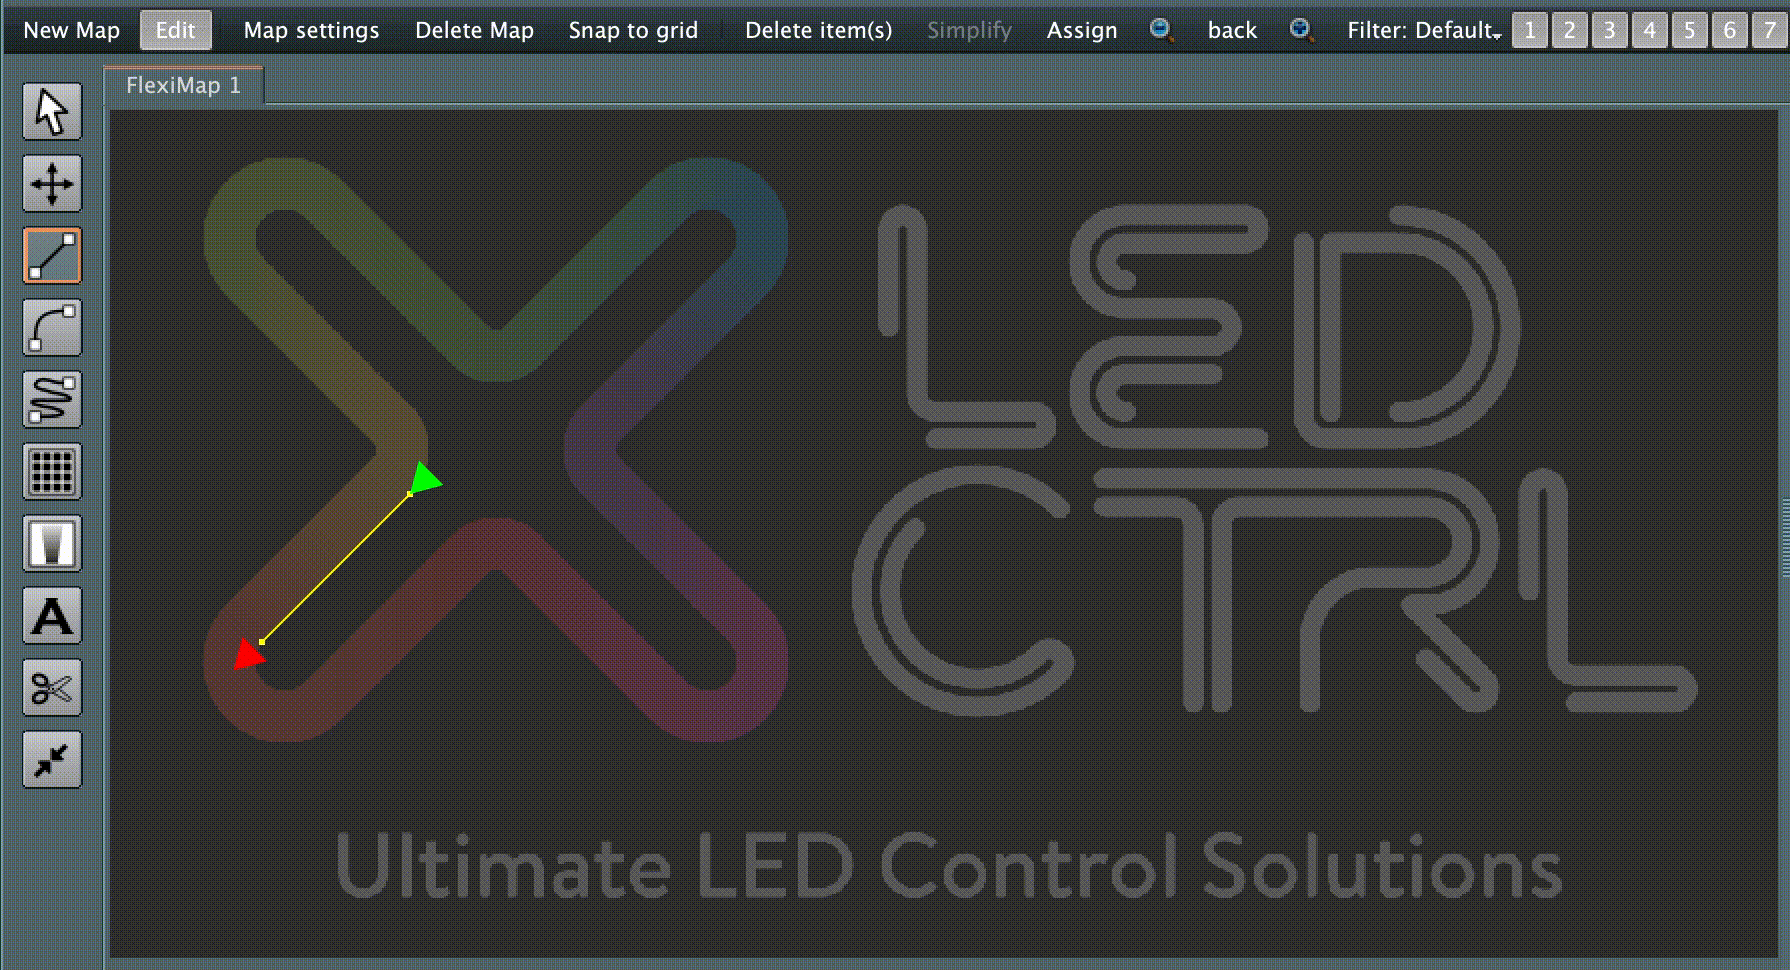
To start with a straight line select the linear tool button (or the shortcut x) and draw a line from desired start to end point by left clicking (and holding) at the start point and releasing the left click at the desired end point. A line will be displayed with green and red arrows indicating the direction of the data flow.
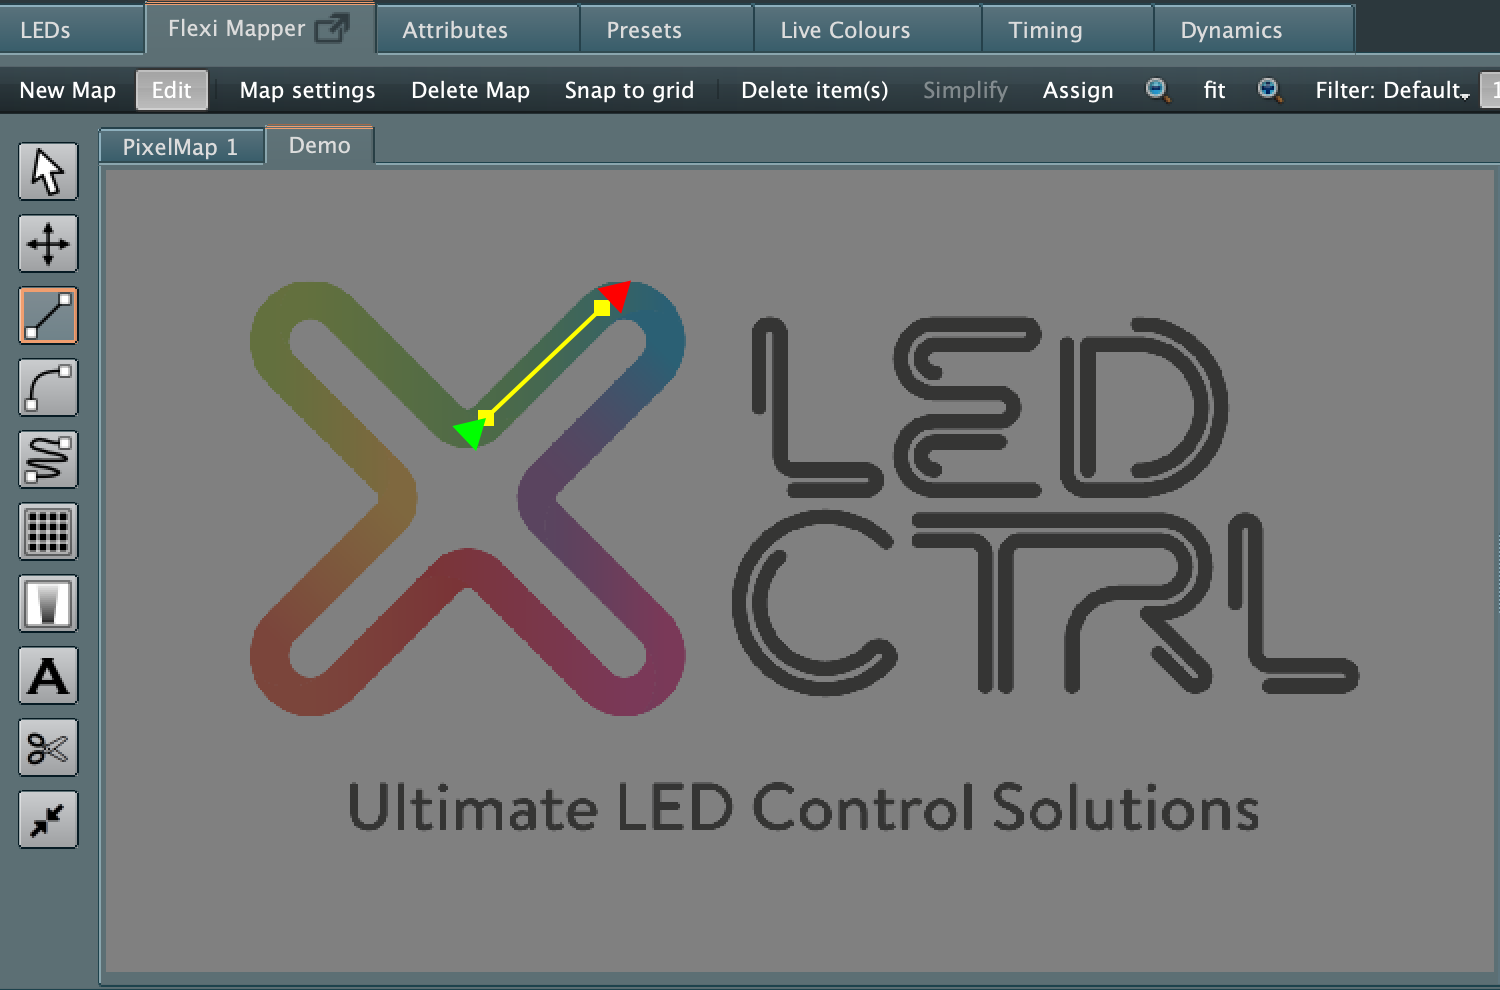
If shift it held down while creating the line, the placement will constrain to a horizontal or vertical line only.
Adding a curved line
To add a curved line select the curved tool button (or the shortcut c) and draw a line from desired start to end point by left clicking (and holding) at the start point and releasing the left click at the desired end point. A line will be displayed with green and red arrows indicating the direction of the data flow and control handles will be available to adjust the curve definition.
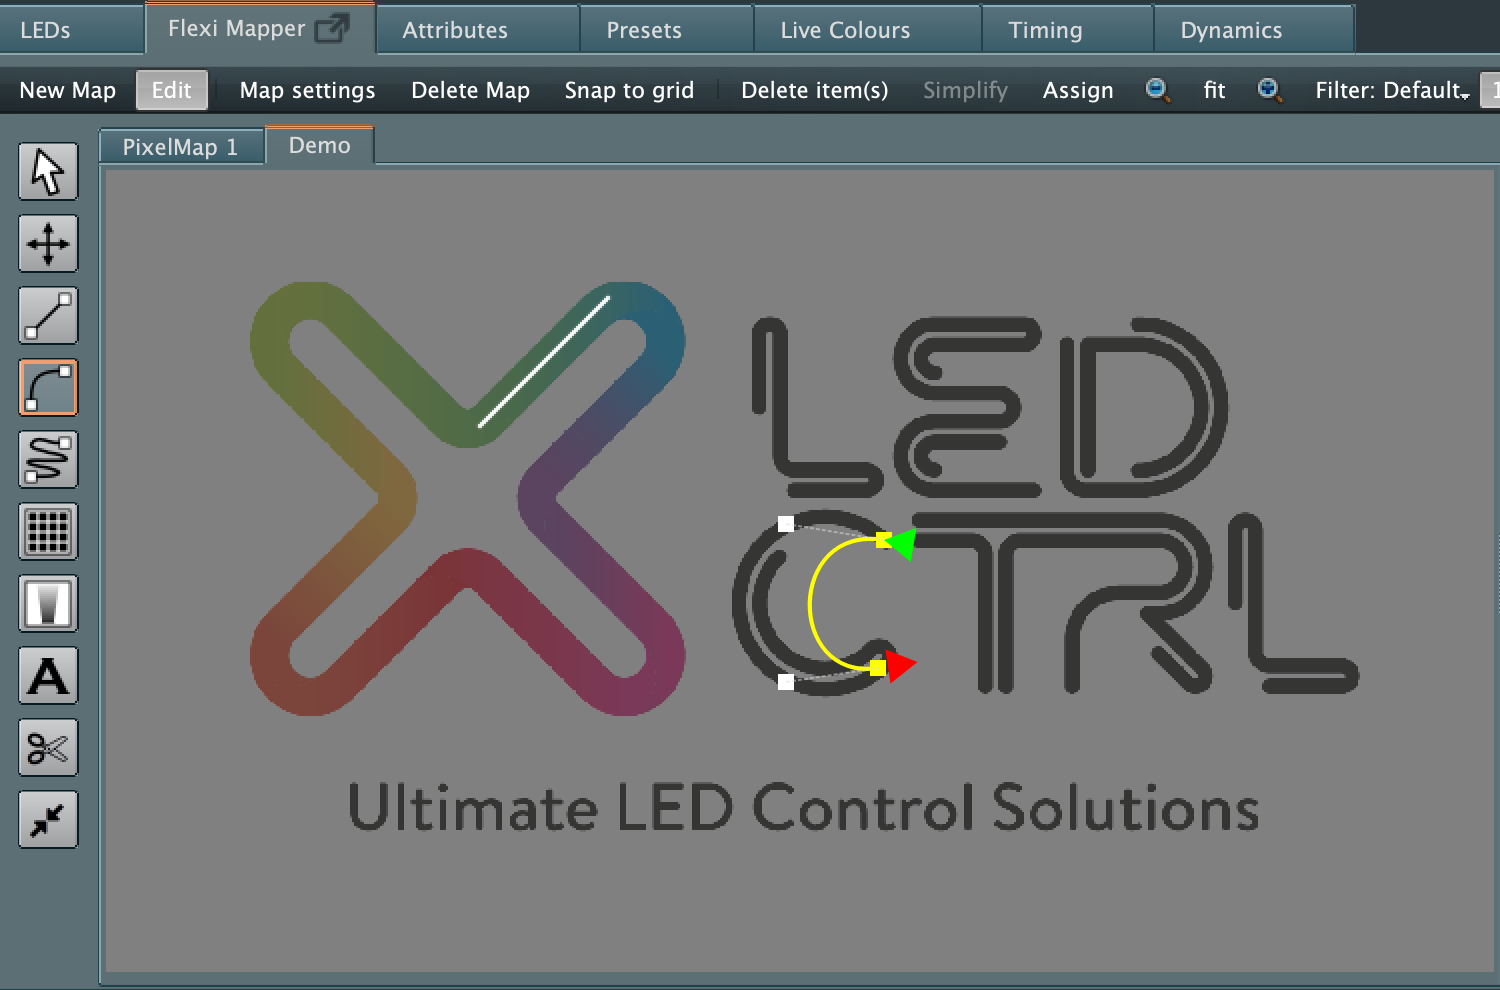
Left click and drag the white square control handles to fit the curve to the layout desired.
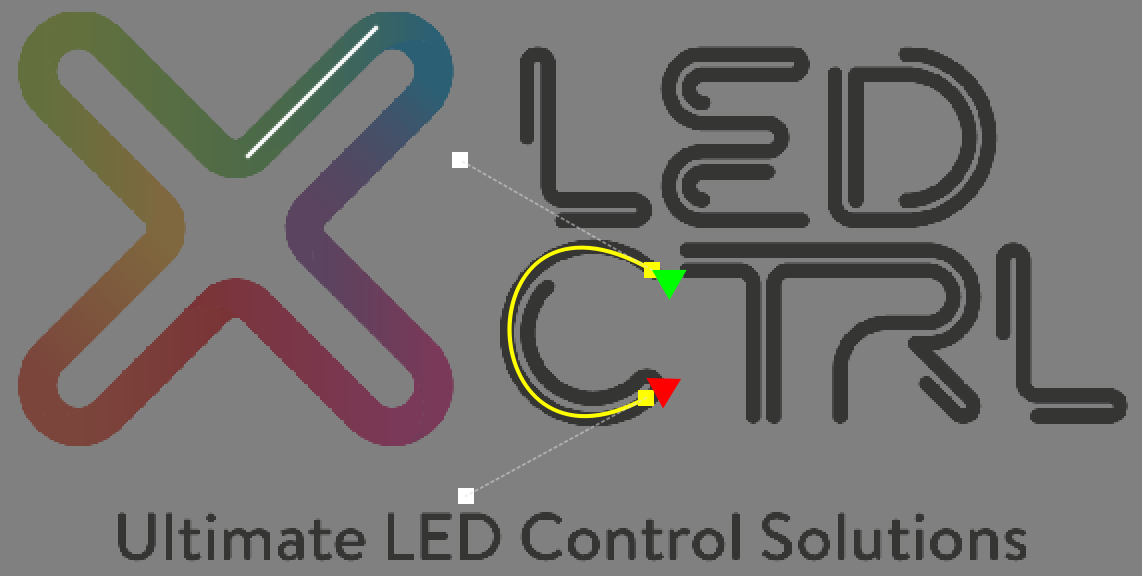
In order to get a perfect fit for curves it is sometimes necessary to add additional control points.
Adjusting a line element
Using the selection tool (shortcut v), left click and drag any control point - this can be a start or end of line (red/green arrow), any control handle or any interim control point.
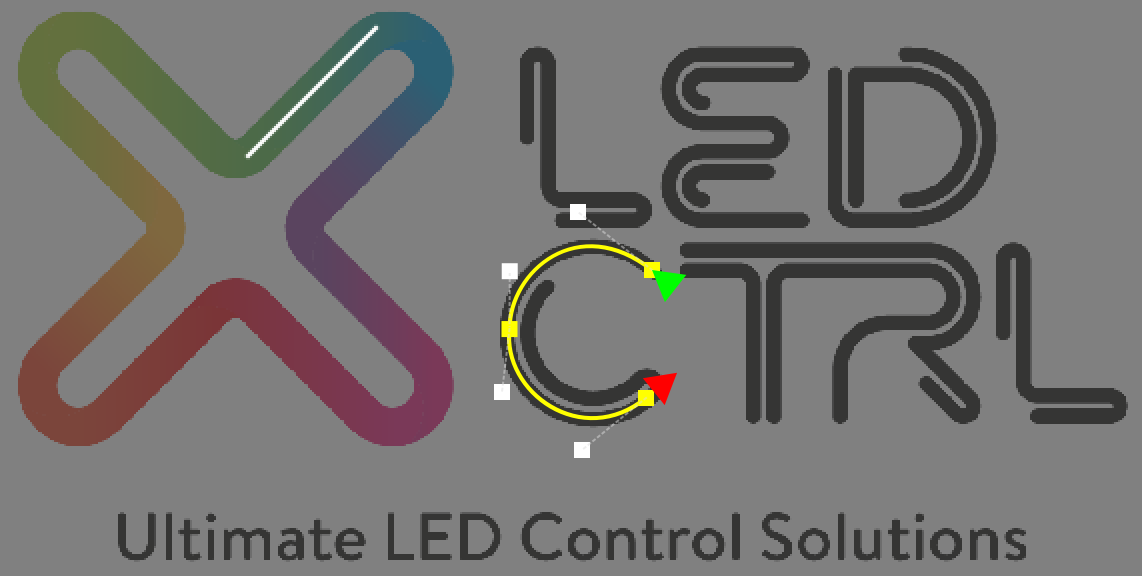
Adding control points to a line
Control points can be added by double clicking on the point in the line where the control point is required. Additionally you can right click on the line at the point where a new control point is needed and select the Insert control point option.
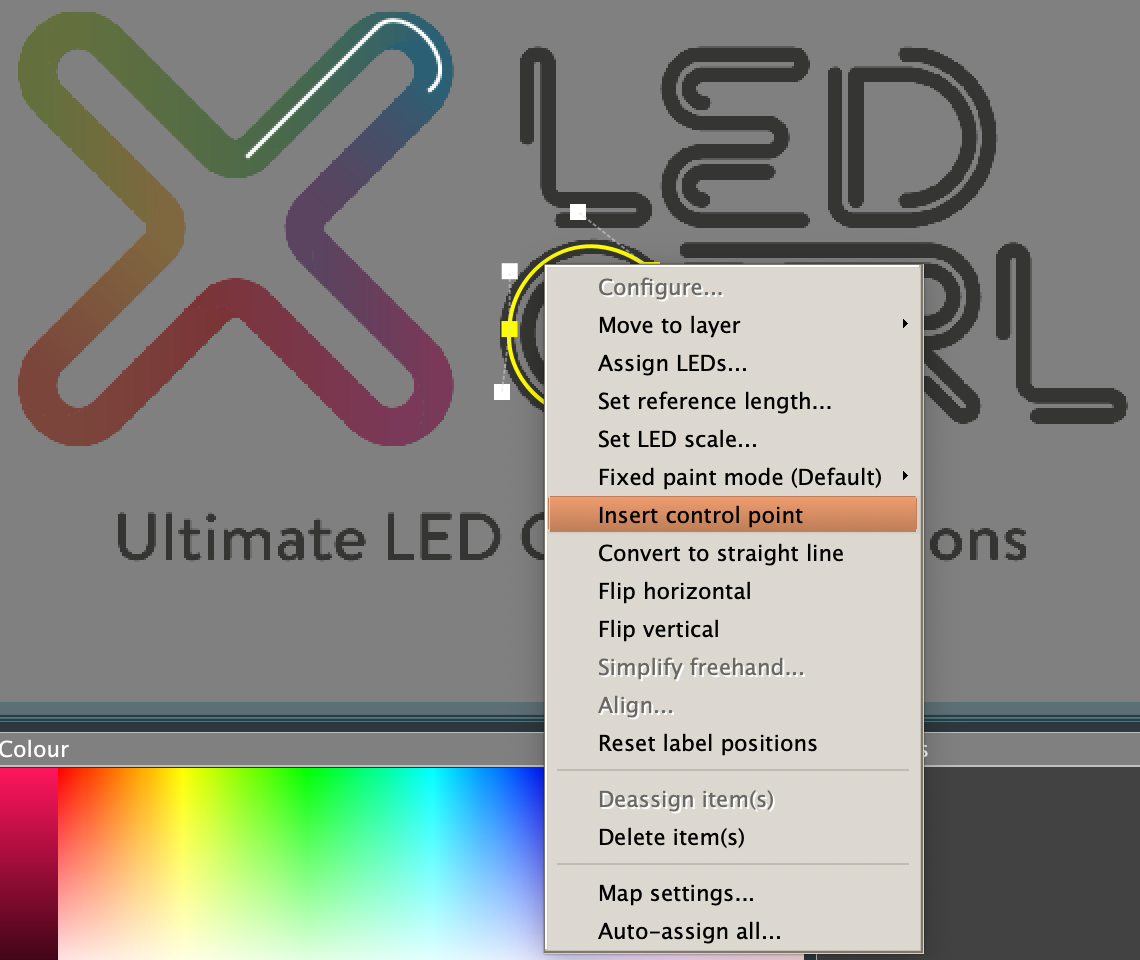
This will provide an additional yellow dot and add control handles either side of the new control point to make fine adjustment much easier.
Extending a line
Lines can be extended by adding straight or curved lines to the start or end of an existing line. Simply select the straight or curved line tool, then left click on either the start or end of an existing line and release at the new end point. Below we add a curve to the first straight line we added.

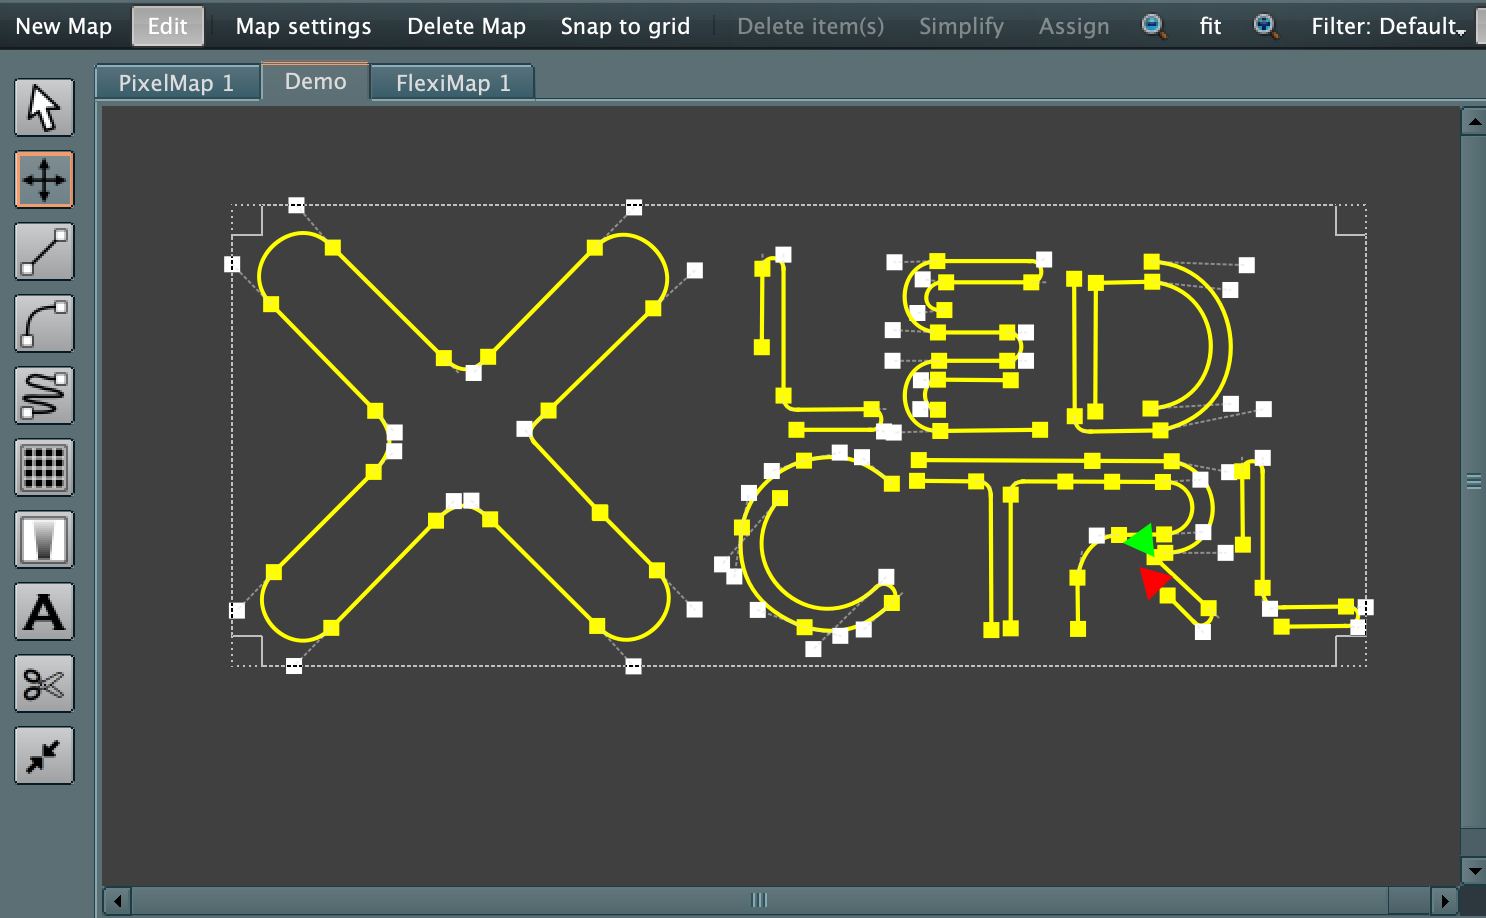
Continuing in this way, full linear layouts can be drawn accurately.

Adding a freehand line
To add a freehand line select the freehand line tool button (or the shortcut f) and draw a line from desired start to end point by left clicking (and holding) at the start point and releasing the left click at the desired end point. A line will be displayed with green and red arrows indicating the direction of the data flow and many control points will be created along the line to allow adjustment of the curve definition.
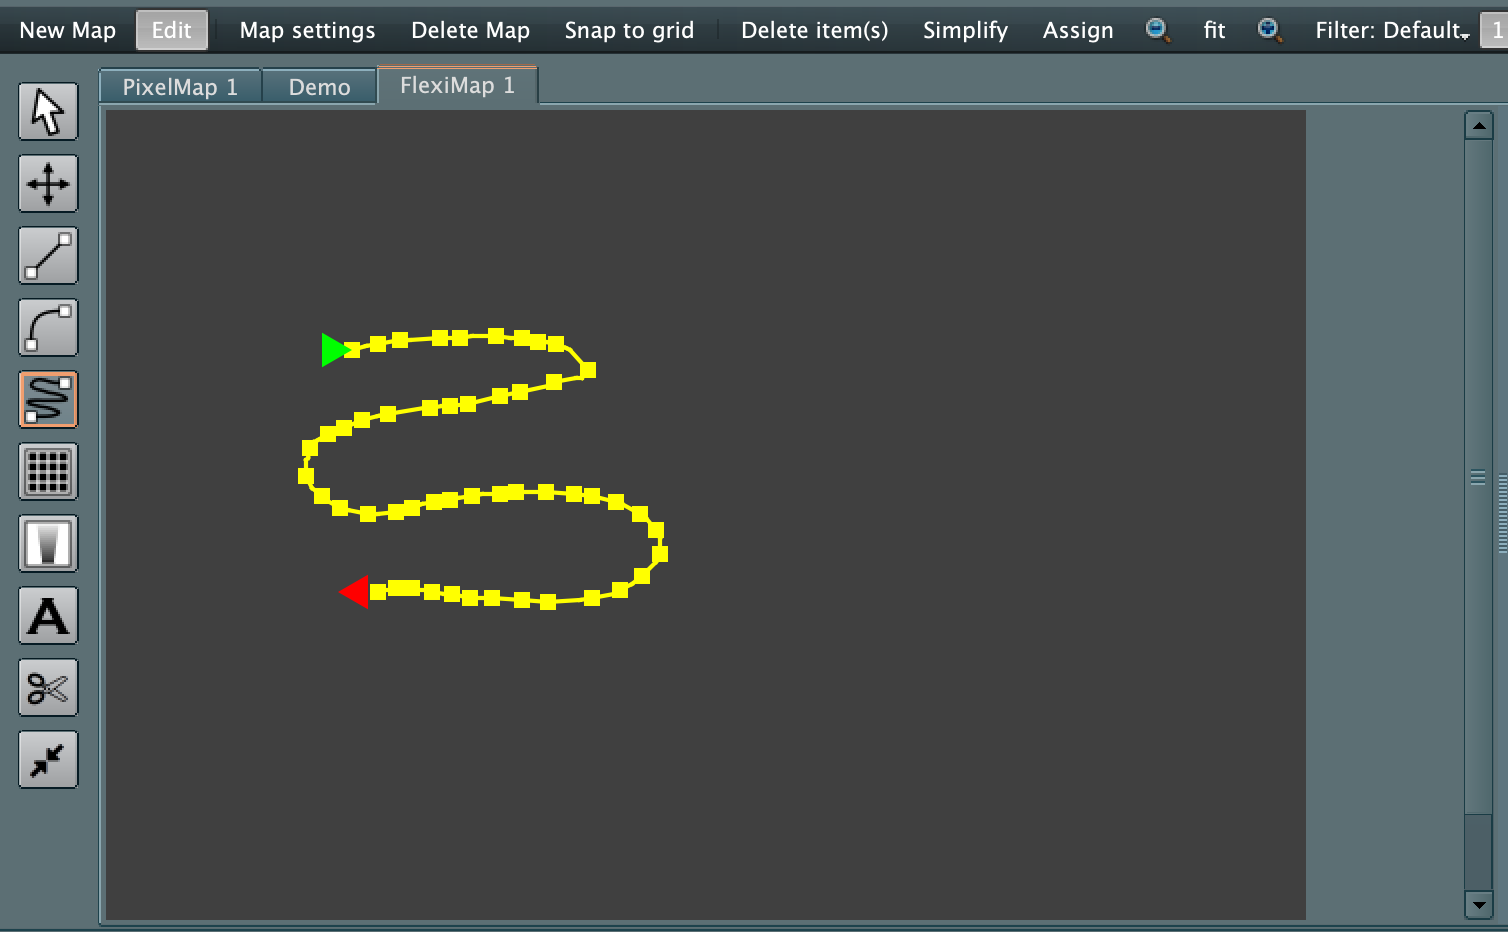
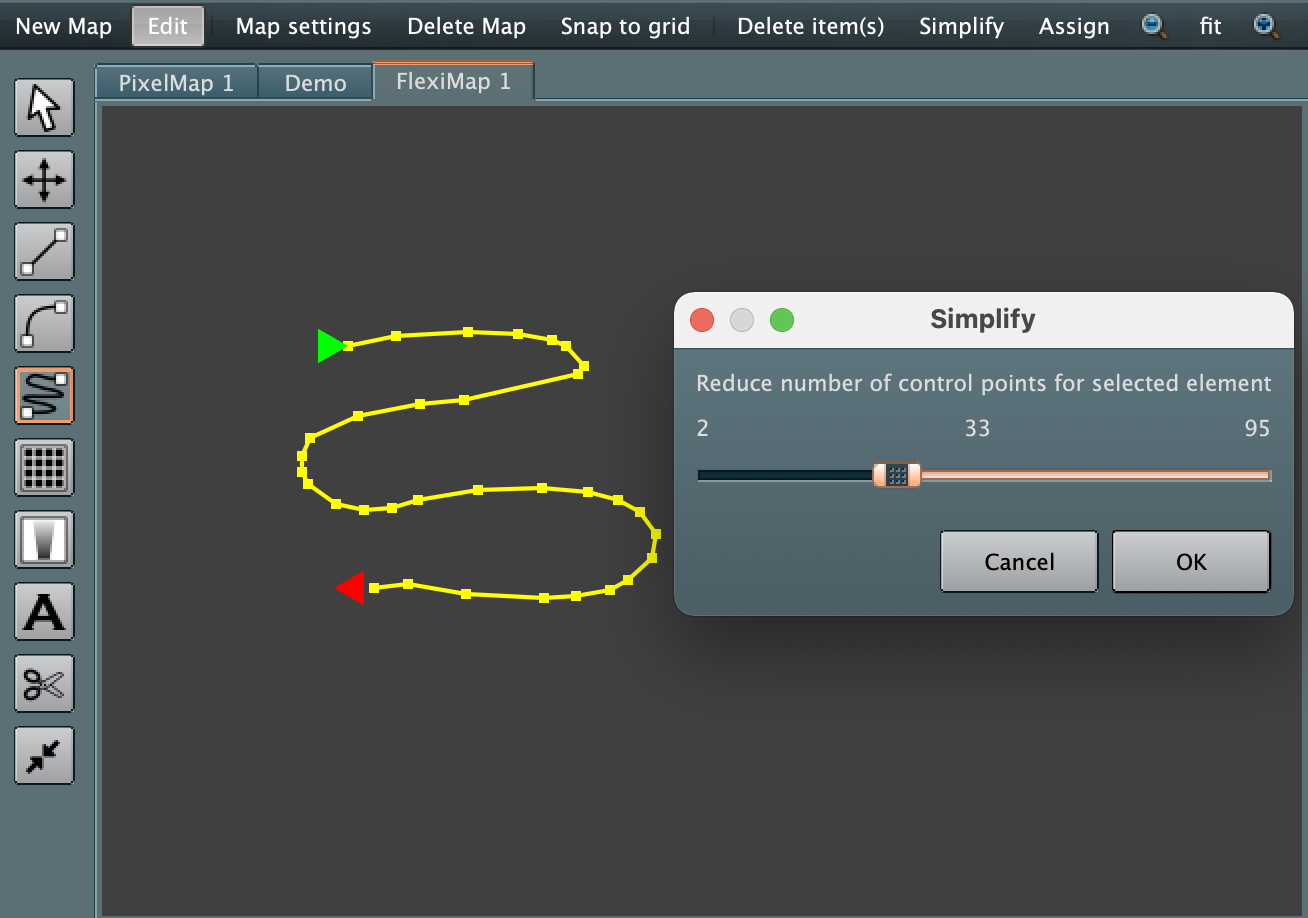
The number of control points can be simplified by right clicking on the object and selecting the Simplify freehand option.
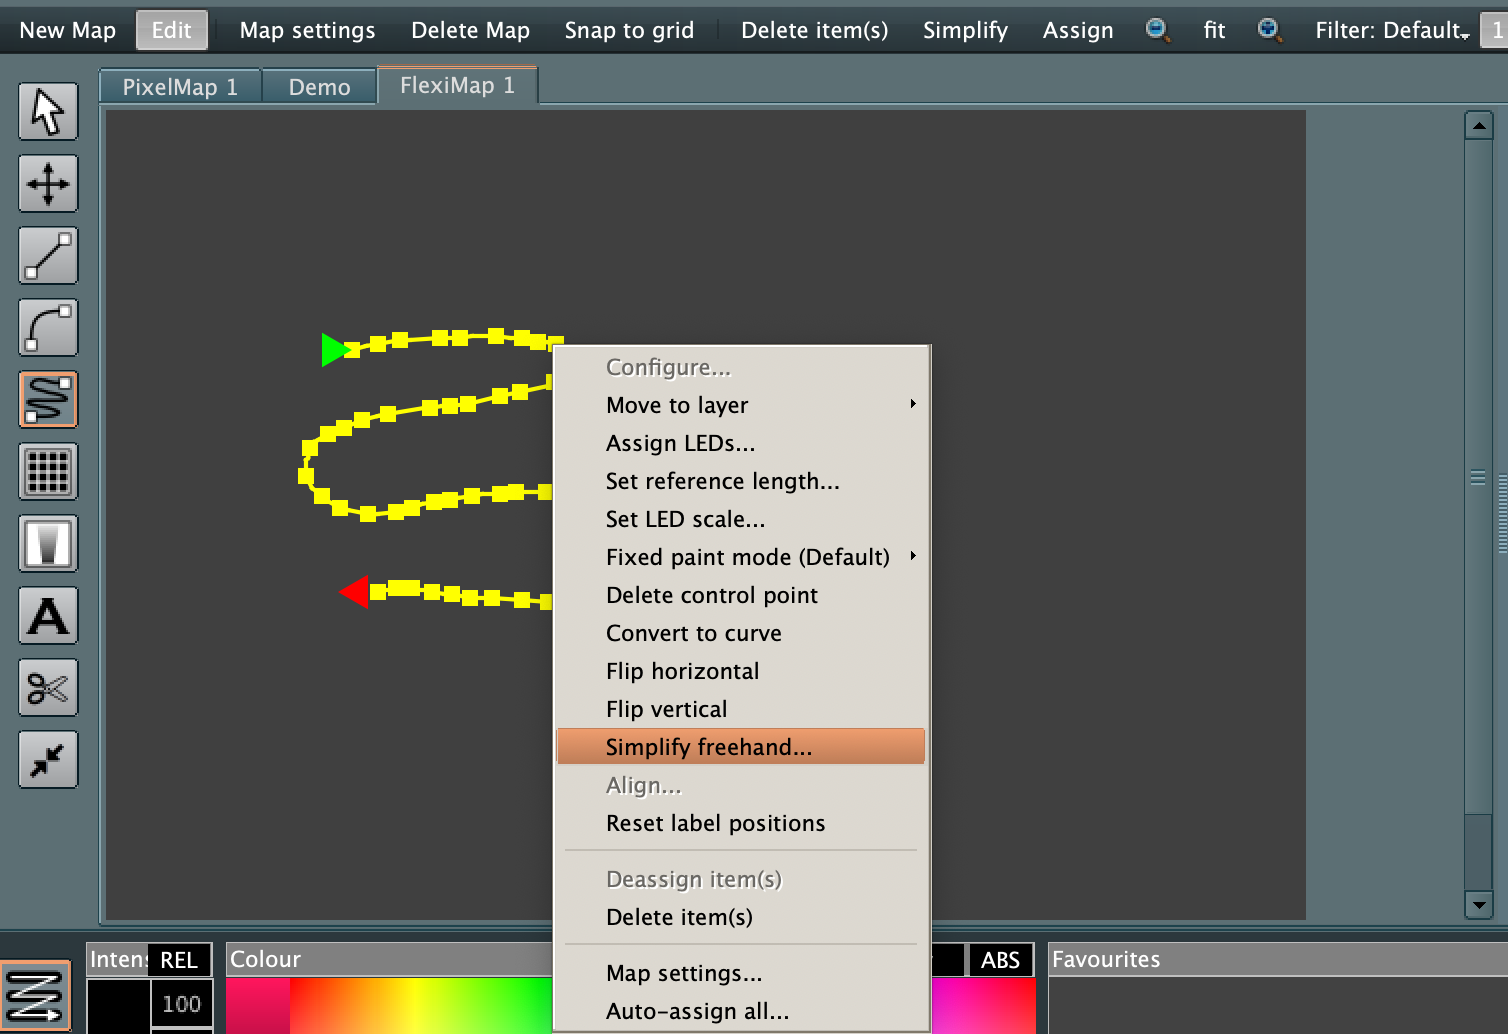
This provides a slider to adjust the density of the control points. Select OK when the line is how you like it or Cancel to leave the original settings.
Adding a mesh
To add a mesh select the mesh tool button and draw a box from desired start to end corner points by left clicking (and holding) at the start point and releasing the left click at the desired end point. A mesh will be displayed and a dialog to configure the mesh will be provided:
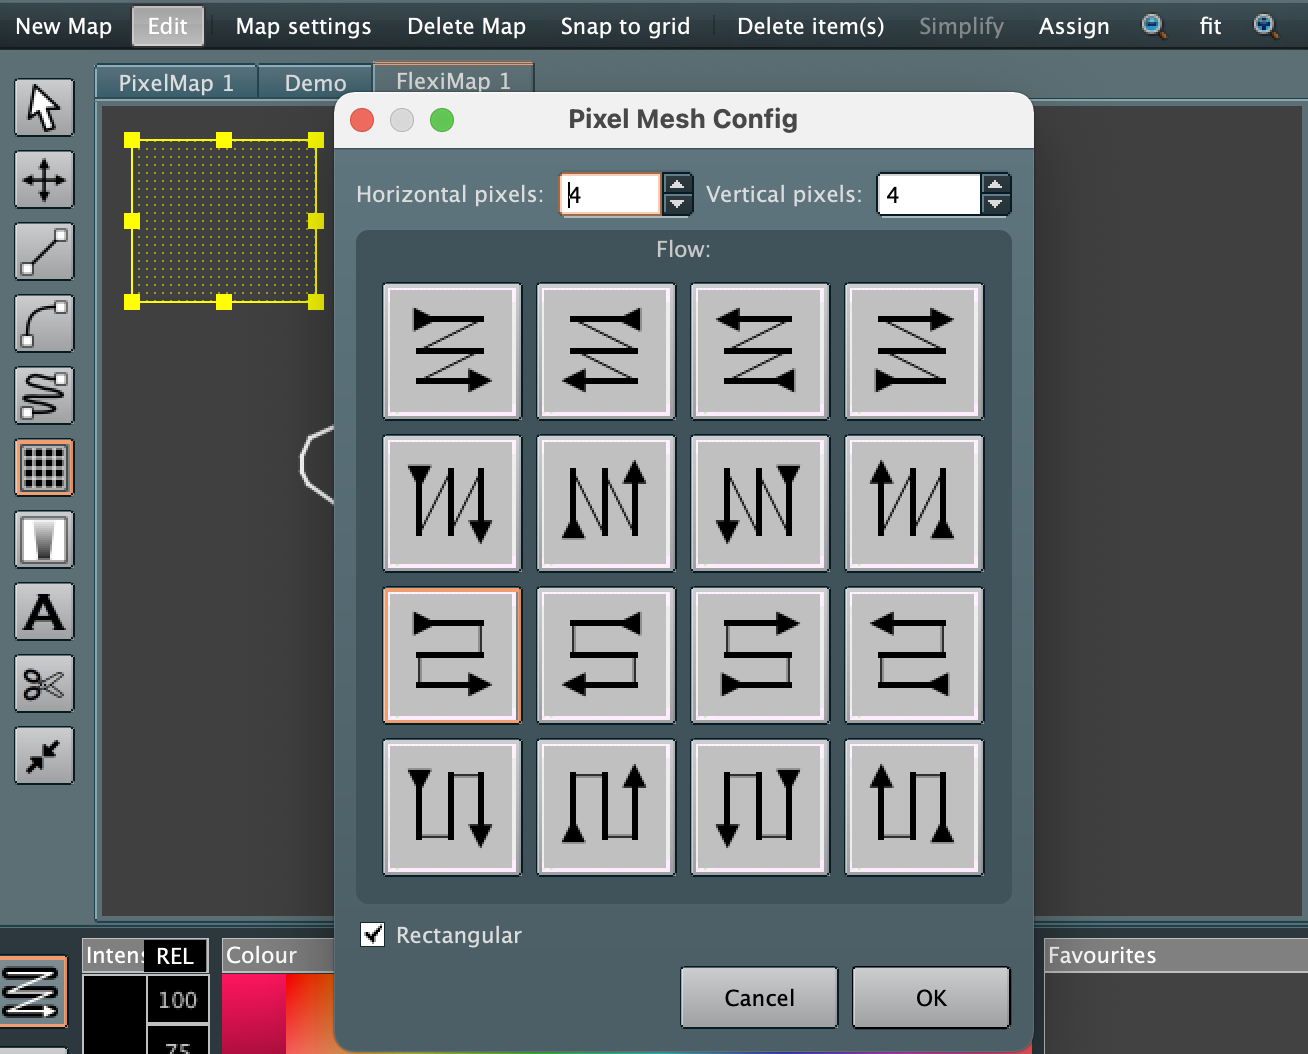 The Pixel Mesh Config dialog allows selection of the number of pixels in the horizontal and vertical direction, as well as the daisy chaining layout of the mesh.
If ticked, the Rectangular tick box constrains the mesh to a rectangular shape, if unticked the mesh can be stretched and skewed to align to a canvas layout or perspective view etc.
Select OK to complete the creating of the mesh.
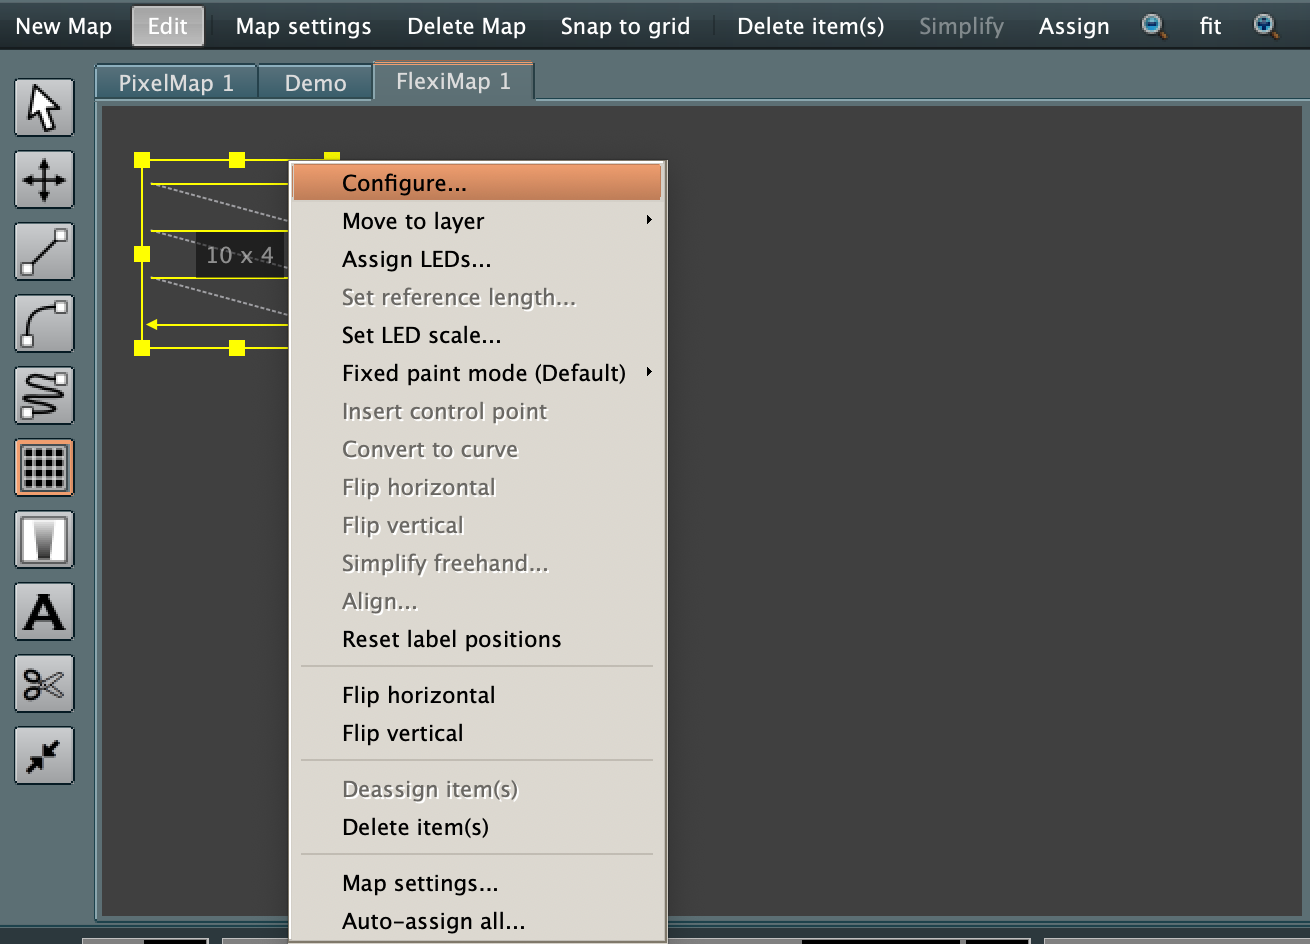
Amending a mesh
A mesh can be amended after it has been created by right clicking on the mesh in Edit mode and selecting the Configure option.
Adding a Grazer/Washer/Spot
To add a grazer or washer select the grazer tool button and left click a point on the canvas to insert the grazer. A grazer will be displayed and a dialog to configure the grazer will be provided:
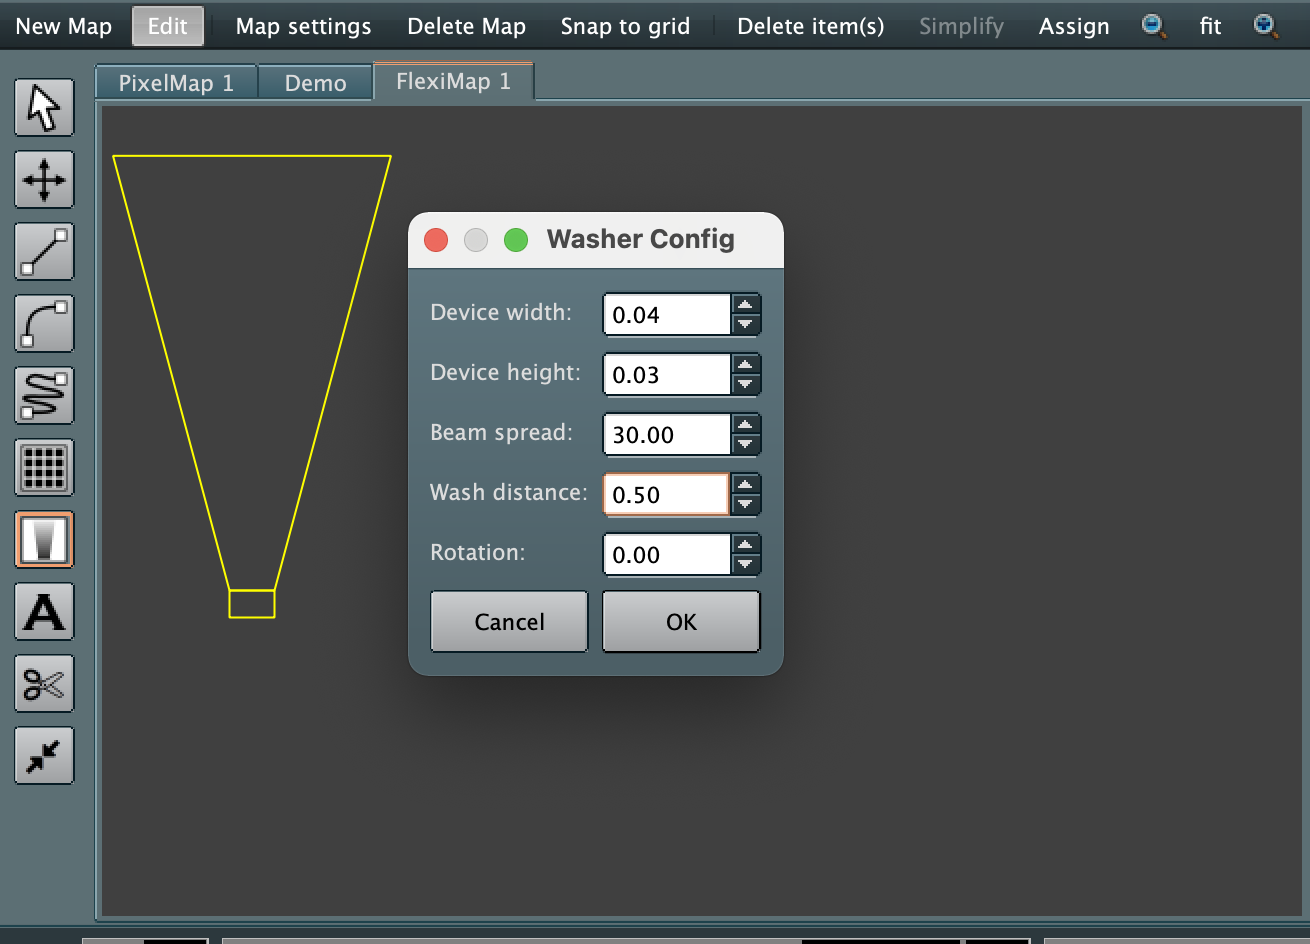
The Grazer config allows for the setting of the illustrated device width, height, beam spread, wash distance and rotation to be set. Note that all these settings are for visual presentation in the LED CTRL Flexi Mapper canvas only and they do not impact the control output in any way.
Select OK to complete the creating of the grazer.
Note if you don't select another tool, clicking on the Flexi Mapper canvas will create another grazer, so if no more grazers are required, select the selection tool (Shortcut v).
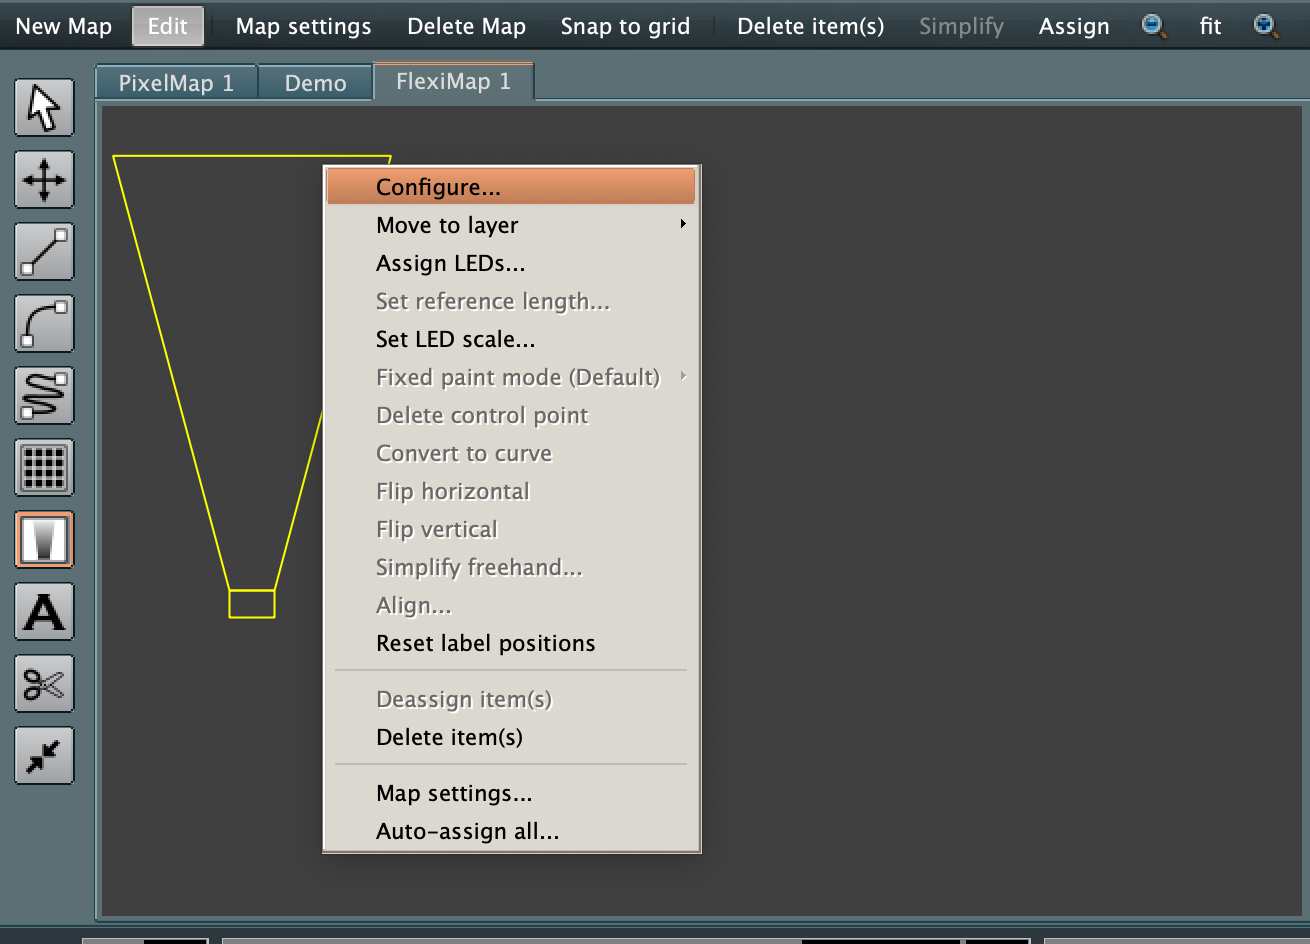
Amending a Grazer
A grazer can be amended after it has been created by right clicking on the grazer in Edit mode and selecting the Configure option.
Adding a Text object
To add a text object select the Text tool buttonand draw a box from desired start to end corner points by left clicking (and holding) at the start point and releasing the left click at the desired end point. A text box will be displayed and a dialog to configure the text box will be provided: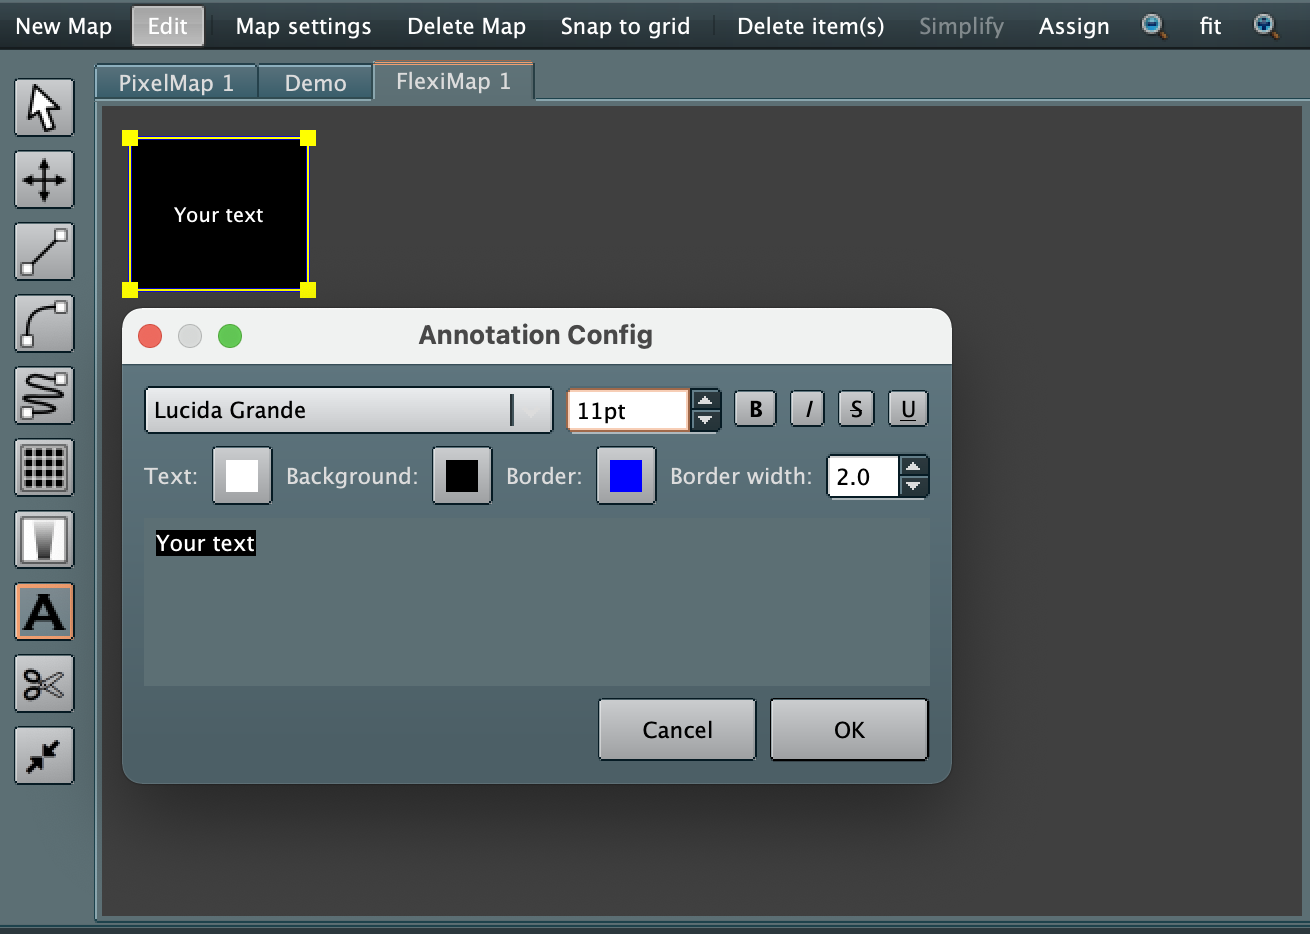 The Annotation Config dialog allows the text to be typed into the box where is shows 'Your text' above, as well as allowing the setting of the font type and scale and colours of all elements. Select OK to save the text annotation.
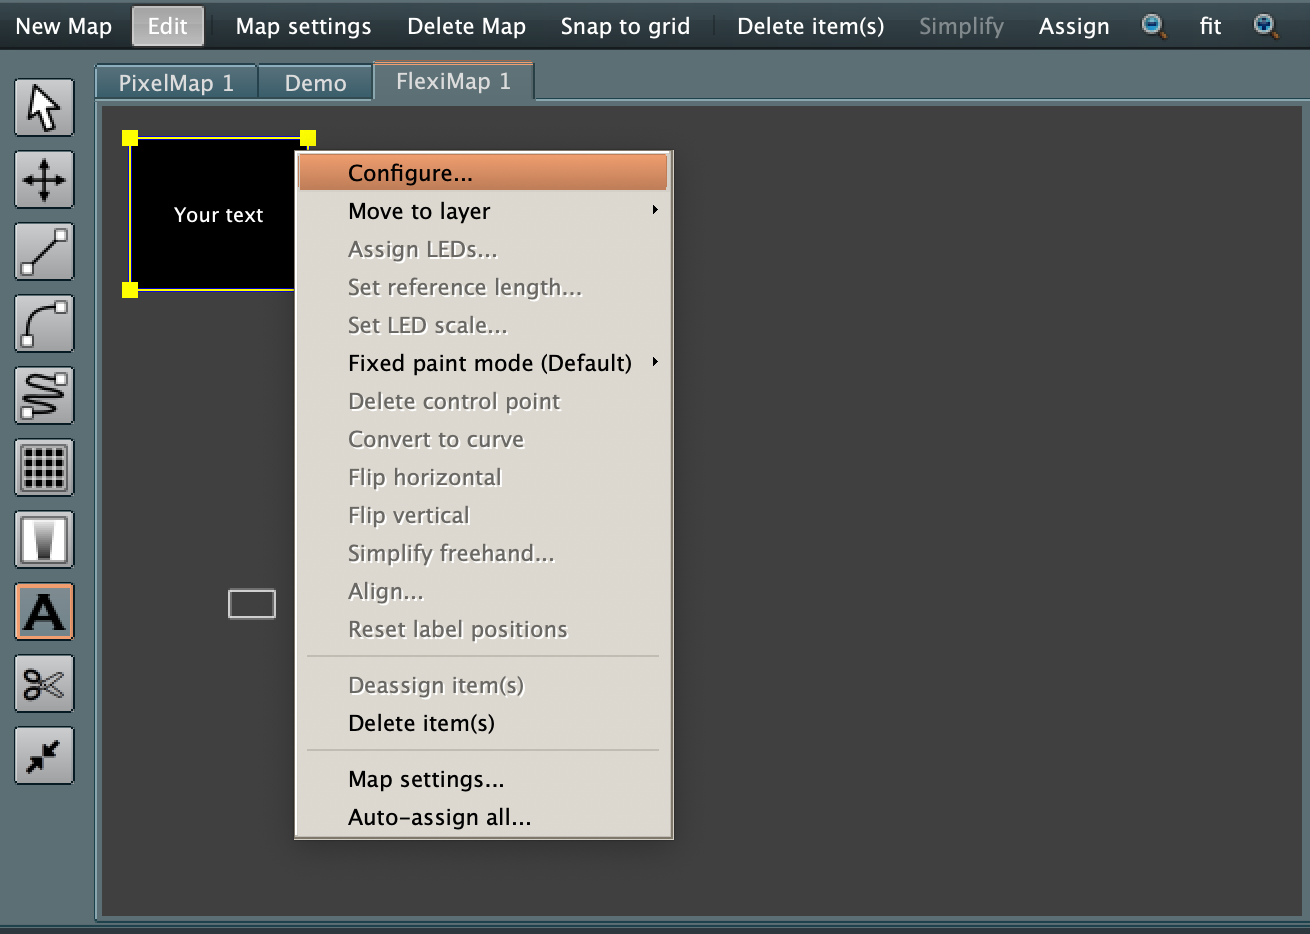
Amending a text object
A text object can be amended after it has been created by right clicking on the text box in Edit mode and selecting the Configure option.
Splitting a line in two
To split a single line in two, select the Split line buttonand draw a cut across the line where required by left clicking (and holding) at the start point and releasing the left click at the desired end point. Your existing line will be split in two. Lines can only be split when there are no LEDs assigned.
Joining two lines into one
To join a two lines into a single line, select the Join line button and left-click drag the selection rectangle over the lines you want to join. Note that there should be no LEDs assigned and the end point of line 1 and start point of line 2 need to be within the selection.
Copying objects
Objects on the Flexi Mapper can be copied when in Edit mode using the standard CTRL-C/ CTRL-V (CommandC/ Command-V). The copied item is placed directly over the top of the original item so will then need to be moved into place by dragging to elsewhere on the Flexi Map.
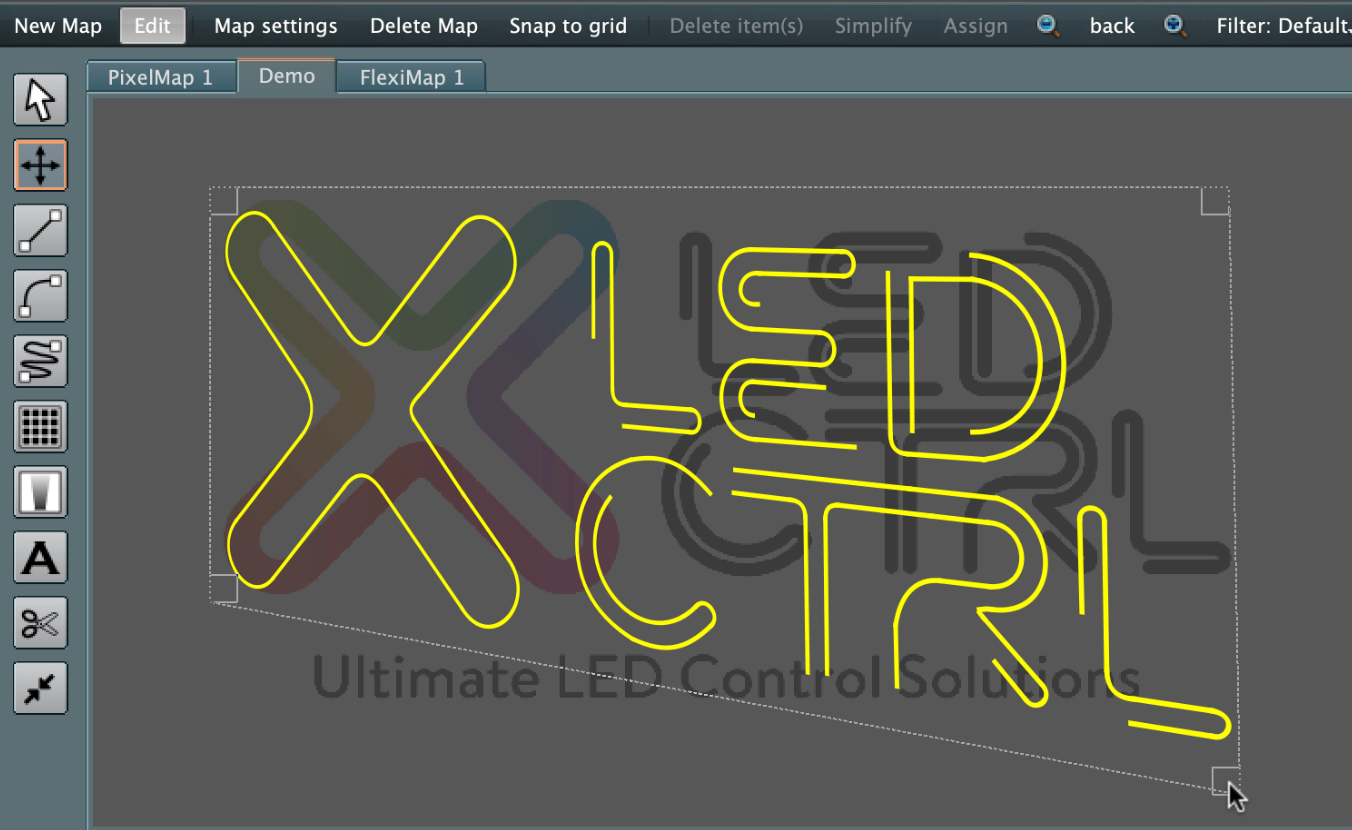
Moving and scaling objects
To move or scale objects the Move/resize tool (shortcut m) should be used in Edit mode.
Objects on the canvas can be selected by either :
- left clicking on a single object
- using CTRL/Command and left click to select multiple objects
- left click hold and drag then release, to rectangularly select objects in the region
- combination of the above.
Objects selected together form a temporary group to be moved/scaled together. The control box is placed around all the selected objects with control handles square visible in each corner a shown below. Left click and hold a corner control point to drag it to where you want it, then release.
Holding the CTRL/Command key down while resizing the box skews the lines to allow them to be aligned to a perspective view:
Holding the ALT/Option key down while resizing the box shows a circle in the bottom right control handle which allows the group to be rotated.